Now Eat This! New York Food Truck
 I walked out of the subway this morning and found myself walking toward a food truck bearing the sign “healthy comfort food.” I’m always intrigued by anyone claiming to sell “healthy” foods, but most of the time, their idea of “healthy” falls quite a bit below my standards!
However, I am happy to say,the Now Eat This food truck is not only tasty but also reasonably healthy. That said, I do wish they would tell you the carb count along with the rest of the nutritional information.
MENU: The primary aim of their menu appears to be low calorie food with an emphasis on gluten free and sugar free. For example, you can get gluten free meatballs with penne pasta (349 calories), faux fried General Tso’s chicken (310 calories), or a cheesy turkey black bean enchilada with low carb tortilla (302 calories).
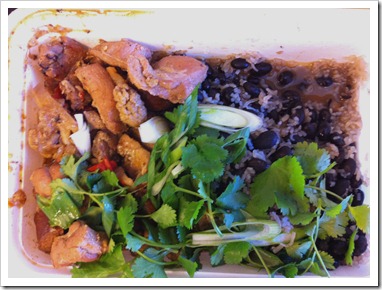
In addition, they also have one low carb option, which I went for: chicken & andouille jambalaya with no carb Shirataki rice (they do add black beans, which have carbs). This dish is pictured below. The meat was pretty decent quality and the sauce was tasty (with just a bit of spice). I was a bit worried about the Shirataki rice, but it actually tasted pretty good and soaked up the flavors well.
DRINKS: They sell only zero-calorie drinks, including iced tea, Zevia, and other calorie-free sodas.
THE STORY: The food truck was started by celebrity chef Rocco DiSpirito (and I assume that’s his picture plastered across the truck). They also sell his cook book at the truck! Although this sounds like a blatant promotion for Rocco, I do appreciate the fact that 100% of the proceeds from the sales at the food truck go toward educating New York City schoolchildren about how to cook and what is healthy to eat.
WHERE TO FIND IT? If you’re in NYC, then the best way to find it is via facebook or twitter as the truck moves around from day to day. I found it today at 52nd and Lex. They are also now on Seamless, although I’m not positive what delivery radius they have.
Perfect Scrambled Eggs??
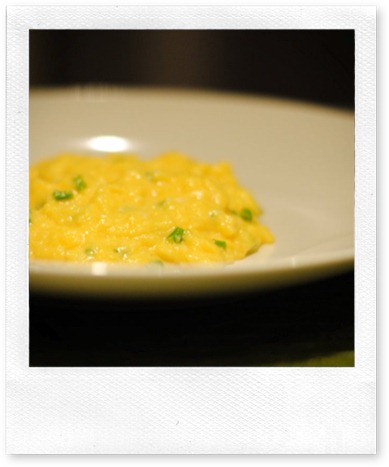
Ok, so you’re wondering what I could possibly say about scrambled eggs that you don’t already know! And two days ago, you would have been correct to wonder! But now that I’ve seen this video, I absolutely must share with you Gordon Ramsay’s PERFECT scrambled eggs.
If you think you already know how to make perfect scrambled eggs….think again! Apparently (according to Gordon Ramsay), even many of the most experienced chefs don’t know how to make good scrambled eggs! This is definitely not your typical scrambled eggs.
As you’ve probably heard before, the key is don’t overcook the eggs. But, this isn’t all that he does – with a few simple techniques, such as not whisking the eggs and not melting the butter prior to heating them, he creates scrambled eggs that are much creamier and much tastier.
I’ve tried to summarize the technique below, but I recommend you also watch the video (although ignore the part about bread if you’re on a low carb diet).
Who is Gordon Ramsay? For those of you unfamiliar with Gordon Ramsay, he is a fairly famous chef from Britain (there’s some good food in Britain, I promise!). He’s most famous in the US for the TV show, Hell’s Kitchen, in which he shouts and swears a lot (a lot!) in reaction to the mistakes made by aspiring chefs at the Hell’s Kitchen restaurant! I personally prefer the British TV show, Ramsay’s Kitchen Nightmares, where he visits various struggling restaurants and attempts to turn them around with varying degrees of success.
How to make PERFECT Scrambled Eggs:
[print_this]
Ingredients:
- 3 eggs (do not whisk! – this is very important!)
- 2 tablespoons of butter (unsalted)
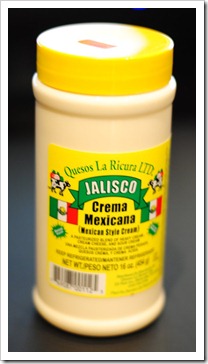
- 1/2 tablespoon crème fraiche (or Crema Mexicana if you can’t find crème fraiche). I think the recipe also works without this ingredient, but it’s better with it.
- 2 teaspoons of finely chopped chives (optional)
- 1/4 teaspoon salt (or to taste), and a small amount of pepper
Directions:
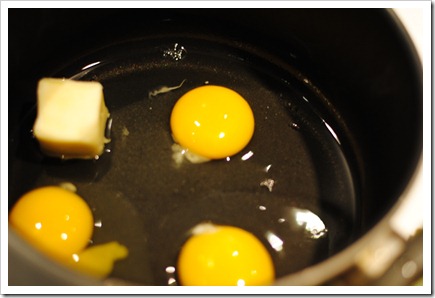
- Crack the eggs into a pot and and add the chunk of butter to the pot.
- Put the pot onto medium heat and start stirring so that the eggs get broken up.
- Keep stirring without stopping. After around 2 minutes, the chunk of butter will have melted.
- Move the pot off the heat when you start to see some of the egg sticking a bit to the bottom of the pot. Keep stirring off the heat for about 10 seconds and then put it back on to the heat for another 20-30 seconds, but always keep stirring. Do this three or four times until you see that the mixture begins to become slightly more solid (but do not wait until it’s actually solid!).
- Once the eggs have just begun to solidify, take the pot off the heat permanently. Quickly stir in the 1/2 tablespoon of crème fraiche (or Crema Mexicana) and the chives.
- Lastly, season with salt and pepper.
How do the eggs taste? Delicious with a very creamy texture and taste. I also like how the chives add an extra dimension to the flavor. Can’t wait to try it with some smoked salmon like Gordon suggested in the video. Let me know how you like it!
Crackers
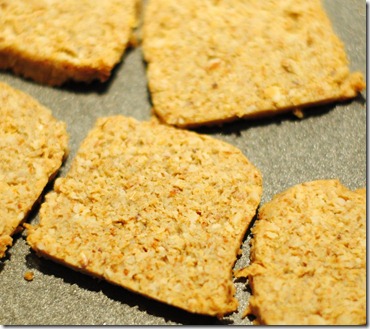 I saw a great recipe on Mark’s Daily Apple yesterday that I just had to try – crackers! You can dip them, spread cheese on them, or eat them by themselves. Of course, as Mark points out in his post, this is not something you should be eating for every meal just because it tastes so good, but it does make a great snack once in a while.
I’ve modified the recipe a little so that it’s not so crumbly, which makes it a bit easier to cut and cook. I substituted part of the almond meal for flax meal. This also adds some extra fiber to the cracker without really changing the taste or the texture. I’ve described the basic recipe below along with one option for seasoning, but you can change the seasoning to any spices that tickle your fancy.
Ingredients:
- 1 1/2 cups of almond flour (or almonds food-processed into small chunks)
- 1/2 cup of flax meal
- 1 egg
- 2 tablespoons of olive oil (I love the Columela Extra Virgin Olive Oil from Spain because it just has amazing flavor with everything!)
- seasoning: (3/4 teaspoon salt, 1/4 teaspoon basil. 1/2 teaspoon thyme, 1/4 teaspoon oregano, 1/2 teaspoon onion flakes, 1/4 teaspoon garlic powder)
Directions:
- Preheat oven to 350F (175C).
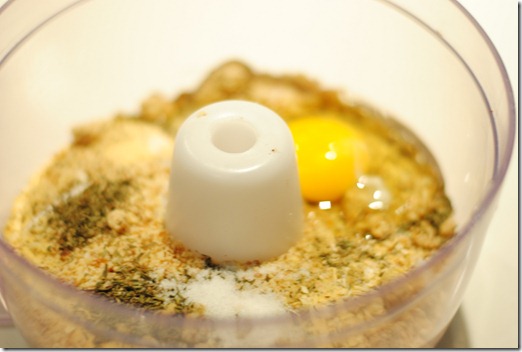
- Place all the ingredients into the food processor and food process well to make a dough.
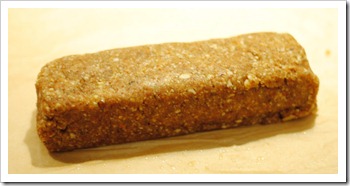
- Shape dough into a log (as shown in the photo below) or roll into a flat sheet using tin foil or parchment paper.
- Place in fridge for 10 minutes to harden the dough.
- If you made it into a log, then cut into thin slices (1/3 of an inch). If you rolled it into and then cut into cracker shapes using a pizza cutter or knife).
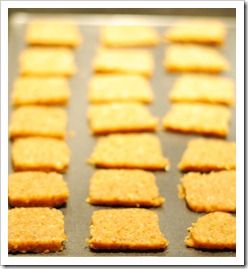
- Place crackers onto baking tray and bake for 10-12 minutes.
- Let cool and store in the fridge over night (this hardens them even more).
Nutritional information (per cracker): 76 calories, 6.7g fat, 2.6g carb (1.7g fiber), 2.7g protein.
Review: Steve’s Original Grass-Fed Just Jerky
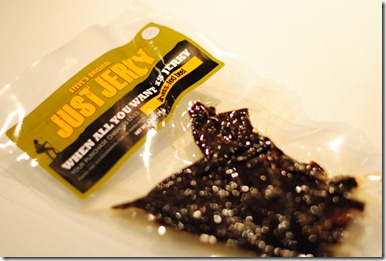
You might think that all dried beef would taste the same, but you’d be wrong. I’ve tried quite a few different jerkies now, and this is probably my favorite. (I say probably, because I also think Angelo’s Turkey Jerky is amazing.) The jerky in question is made by a company that specializes in Paleo food, but this grass-fed beef jerky is suitable for all low carb diets. In fact, it’s so good, you don’t need to be on a diet to enjoy it!
So, I rate jerky in 4 categories:
1) How soft is it? I hate jerky that I have to dislocate my jaw to enjoy, so a softer (but still chewy) jerky scores higher. This jerky is vacuum packed with a very small amount of marinade, which keeps the jerky slightly moister than most jerkies.
2) How flavorful is it? Although I like the taste of beef, it gets a bit boring, so I like my jerky to be full of other flavors! This jerky is marinated with sea salt, apple juice concentrate, paprika, pineapple juice concentrate, beef powder, black pepper, garlic powder, and ascorbic acid. Don’t be scared about the fruit juice ingredients because they’re in such small amounts that they add in negligible amounts of sugar or carbs per 2.5 oz (71g) serving. The marinade has a bit of a tangy sweet flavor to it. You can also taste the pepper along with a little bit of a kick from the paprika.
3) How carb-free and sugar-free is it? Some jerky taste really good because they’re marinated in a LOT of sugar! This one contains some fruit juices, but overall, its carb and sugar contents are both ZERO (for 1 serving).
4) Other advantages or disadvantages? On the plus-side, it’s made from grass-fed beef, which is slightly healthier and in my opinion, often tastes better than grain-fed beef. On the other hand, it’s a bit messy to eat, because it’s rather juicy and makes your fingers sticky.
Final Verdict: 9/10 (I have to save the top score in case something else even more amazing comes along!)
Where can you buy it? You can buy the grass-fed jerky I from Steve’s Original’s own website.
They sell 5 of the 2.5oz packs for $28.75 (i.e. $5.75 per pack). They also have a non-grass-fed jerky, which costs $23.75 for 5 2.5oz packs. Shipping is extra (shipping to New York is $6.62 for UPS Ground 2-7 days, and I expect it might be more to other states since they’re shipping from New Jersey). They also ship to some other countries.
Baking Soda Vs. Baking Powder–Is There a Difference?
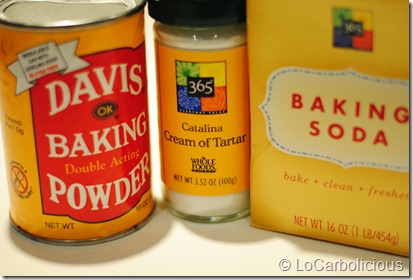 If you’ve ever baked normal (full of carbs) cookies, cakes, or breads, then you have probably used baking soda or baking powder. You might also have come across cream of tartar perhaps. These are all common ingredients that you can find in the baking section of most grocery stores. For a long time, I thought baking soda and baking powder were the same thing and could be used interchangeably. I don’t really know why I thought such a thing – but it does explain why I wasn’t particularly good at baking before!
What is Baking Powder? This is usually a combination of baking soda with an acidic agent (such as cream of tartar, which is described below) along with some other ingredients, such as cornstarch. Baking powder produces carbon dioxide bubbles, which expand in the oven (due to the heat) so that your baked goods will rise and become light and soft. Baking powder can come in two versions: single-acting and double-acting. Single-acting means that as soon as you add the powder to anything wet, it’ll start giving off carbon dioxide bubbles, so you’ll need to put your mixture into the oven quickly to avoid running out of bubbles. Double-acting means that although some of the bubbles are released when you first add the powder to your mixture, most of the bubbles will come out when the mixture heats up in the oven. Therefore, you don’t have to worry about leaving your mixture out for too long when it comes to double-acting powder.
Why is Baking Powder Problematic on a Low Carb Diet? Many low carb diets discourage cornstarch or any other type of starch, but this is unfortunately an ingredient in most brands of baking powder. The starch doesn’t actually add much to the cooking, but it does stop the baking powder from getting moist and clumping together. So, while the baking powder states that it contains less than 1g of carb, you should remember that its serving size is 1/8 of a teaspoon and most recipes call for at least a teaspoon or more (there are 2g of carbs per teaspoon of baking powder). If you’re not super strict on your low carb diet, then a teaspoon of baking powder is not going to be a problem. However, if you’re really counting every carb, then you can make your own starch-free low carb baking powder by using cream of tartar and baking soda combined. A simple recipe for making baking powder is below, but first let me briefly explain what baking soda and cream of tartar are.
What is Baking Soda? It’s 100% sodium bicarbonate, which reacts with anything acidic in your baking mixture to produce carbon dioxide bubbles. These bubbles will start forming as soon as the baking soda touches the acidic ingredients, so you need to bake your mixture fast (otherwise, the bubbles will die out).
What is cream of tartar? This is a white powder (potassium hydrogen tartrate) that is an acidic salt. It’s occurs naturally as one of the by-products of wine-making. It has many uses in foods, the most well-known of which is stabilizing beaten egg whites. Other uses include giving icing and meringue a creamy texture (hence its name I assume) and reducing discoloration of vegetables when boiled. For low carb dieters, it has another use. When added to baking soda, it makes a carb-less baking powder that works just as well as normal baking powder! There have been some health concerns about cream of tartar. First, it is high in potassium, which can be problematic for people with kidney disease or taking medications that prevent the kidney from getting rid of the potassium effectively. When taken in large amounts, cream of tartar can also be a laxative. However, the amount used in normal cooking is generally not a problem.
Low Carb Cookies – Peanut/Almond Butter Cookies that Don’t Crumble!
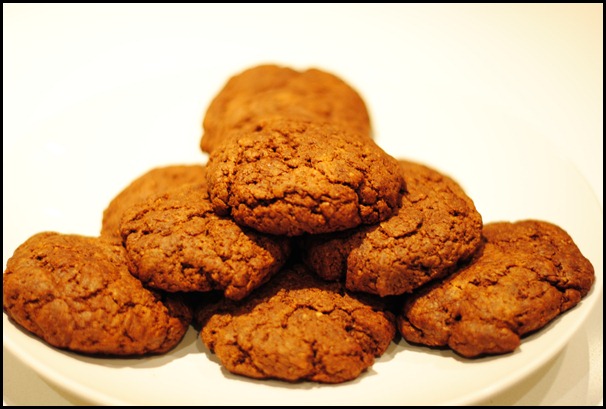
Yes, delicious low carb cookies do exist, and you are looking at a photo of them!!
I tried making low carb cookies several months ago but gave up after finding them to be too crumbly. However, my interest was piqued again this past week when my cafeteria served flourless (gluten free) peanut butter cookies. They were a sell-out! But, making a flourless cookie was only half the battle – I still needed to get rid of the sugar in the cookies. I’ve described my trial and error process below, but you’ll love the ending (I did)….
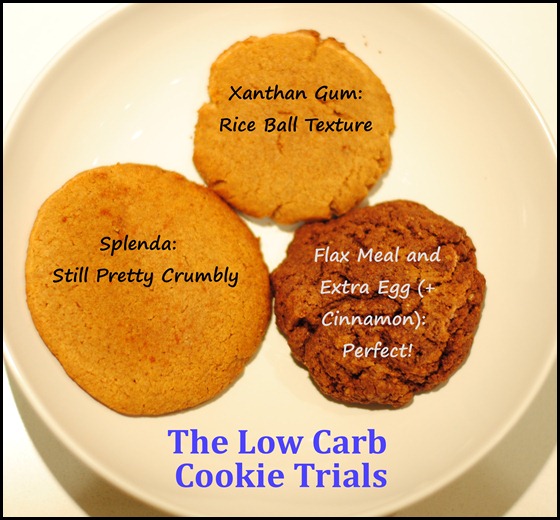
Crumbly Cookie: I looked up a simple flourless peanut butter cookie recipe, which was really simple: mix together 1 egg with 1 cup peanut butter and 1 cup sugar, and then bake for 10 minutes at 375F. I tried the simple substitution of liquid sucralose for sugar. The cookies came out delicious but incredibly crumbly – in fact, I could barely get the cookie to my mouth before it disintegrated into powder. The cookies were vanishing into dust, and I wasn’t even eating them!
Substitute Splenda For Sugar: Next, I tried using Splenda. Although I’m not usually a big fan of Splenda (because of the bulking agents it adds), my cookies were in dire need of some sort of bulking agent! The cookies came out less crumbly, but were still very dry and all-too-eager to break into pieces.
Xanthan Gum? I took some serious action after that by adding in some xanthan gum (which is a thickening agent that’s great in soups like egg drop soup). This made the cookies more coherent, but it also gave it a chewy texture – reminiscent of Japanese mochi or rice balls (both which are generally made from glutinous rice flour).
Eureka: I soon (after quite a few more batches!) realized that perhaps eggs could act as the glue in this recipe. But I couldn’t just add more eggs in – it would make the recipe way too liquidy. I had to add something in with the eggs. That’s when it came to me…flax meal. The xanthan gum went out and the flax meal and extra eggs came into the mixture. The cookies came out more solid, with a texture rather like oatmeal! Success at last.
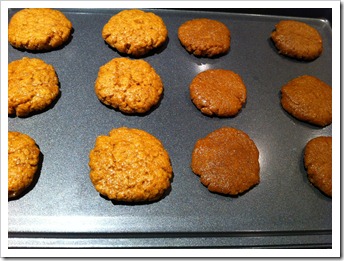 Making the Cookies Rise: Now that I had figured out how to make the cookies not crumble, I turned to the problem of making them rise. I wanted cookies that were lighter and less dense. Baking powder and baking soda are the common ingredients for making baked goods rise. To minimize usage of baking powder (because it contains a little bit of unnecessary carbs), I used cream of tartar instead. I’ll explain in my next post what all that means. Basically, I tried adding just baking soda (the cookies on the right), and then both baking soda and cream of tartar (on the left), and the cookies definitely rose more with both ingredients (even before putting it into the oven)! As you can see, cream of tartar also lightened the color of the cookie. (The photo shows the cookie dough prior to cooking.)
THE RECIPE
Ingredients (12 cookies):
-
1 cup peanut or almond butter (make sure it has no added sugar or salt or anything else!)
-
2 eggs
-
1 cup equivalent of Splenda
-
1/2 cup of flax meal
-
1/2 teaspoon baking soda
-
1 teaspoon cream of tartar
-
Optional: 2 tablespoons vanilla extract, 2 tablespoons of cinnamon, 1 teaspoon of nutmeg, 1/8 teaspoon of ground cloves (if you don’t really like the taste of nuts, then these will hide the nutty flavor well)
Directions:
-
Preheat oven to 375F.
-
Mix the dry ingredients (Splenda, flax meal, baking soda, and cream of tartar together).
-
Add the peanut/almond butter and the 2 eggs.
-
Shape into 1 and 1/2-inch balls and flatten into cookies.
-
Bake in oven for 8 minutes.
-
Leave to cool (they’ll harden a bit more upon cooling).
Note: the dough may look rather oily before you put it into the oven (and I think the cinnamon might draw some of the liquids out of the dough so that it looks like your dough is sitting in a puddle of water), but it comes out non-oily and moist on the inside!
