Salmon Bake
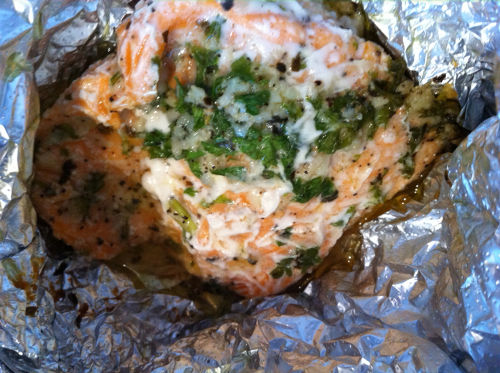
Salmon Bake on Tin Foil
I never use my oven enough when I’m cooking – I think it’s probably the Asian in me! My parents have a large kitchen with 3 ovens, and yet they never use any of them! I’m not even positive they know how to use the oven! The only time I remember using the oven before college was to dry a piece of plastic (which then melted of course, duh!) and making cheese on toast (a fav of mine from my childhood days!). Well, this diet is pushing me to discover new appliances! I discovered what the broiler button on my oven did a year ago (while trying to figure a way of cooking sausages more conveniently), and now I’m discovering just how good salmon can taste when baked in the oven. This is a simple and quick recipe from allrecipes.
Ingredients to make 2 fillets of salmon
- 2 cloves garlic, minced
- 6 tablespoons olive oil
- 1 teaspoon salt
- 1 teaspoon ground black pepper
- 1 tablespoon lemon juice
- 2-3 tablespoon fresh parsley, chopped
- 2 (6 ounce) salmon fillets without the skin
- 1 teaspoon dried basil (optional)
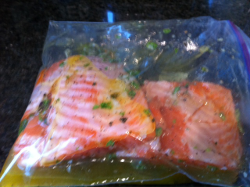
- First we’re going to prepare a quick marinade for the salmon. Mix together the minced garlic, olive oil, salt, pepper, lemon juice, and parsley (and the basil if you have some in your kitchen). This is going to be your delish marinade.
- Pour the marinade into a ziplock bag and place the salmon fillets into the bag as well. Seal the bag tightly and place into the fridge for an hour.
- Preheat the oven to 375F (190C).
- Take the fillets out of the ziplock bag and place them onto a piece of aluminum foil and turn the edges of the foil up so that none of the marinade spills out. Pour a bit more of the marinade onto the salmon and cover the salmon fillets up with the foil. I would the put another piece of foil around the your salmon-filled aluminum package just in case any of the marinade spills out.
- Place the aluminum package into a baking pan (or glass dish made for baking) to prevent spillage, and bake for 35-45 minutes (until the salmon comes off in flakes).
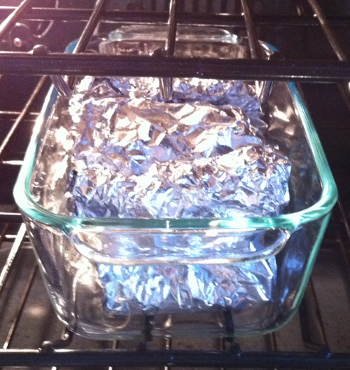
Salmon wrapped in Aluminum Foil in Oven
Bacon Egg Bake – Exciting Variations on Eggs

Empire State during thunder and lightning
It sounds like something from a Frankenstein movie outside – thunder and lightning and huge sheets of rain drumming against the window. But inside, I’m nice and dry and about to bake something delicious! Eggs are a staple ingredient of low carb life. It’s good as a snack, as a salad garnish, or as a meal. However, hard boiled eggs, fried eggs, scrambled eggs, omelets and egg salads are so commonplace that the thought of having to eat them again and again can create severe nausea and a pounding headache! So here is a new way to spice up your egg-eating life – the bacon egg bake. I found this recipe on allrecipes.com, and it works great! In essence it’s just a different way of dressing up the bacon and eggs that I eat for breakfast daily, but it does look a lot more appetizing – it almost looks like something you’d find at an upscale brunch place, especially if you place it on a bed of green leaves!
Ingredients to make 1 Bacon Egg Bake
- 1 slice of bacon
- 1 egg
- 1 tablespoon of grated aged cheese (or a slice) – I recommend aged Cheddar or Parmesan
- salt and pepper
- 1/4 teaspoon melted butter (optional)
- you’ll also need a muffin/cupcake pan
- Preheat the oven to 350F (170C).
- Cook the bacon so that it’s not crispy and won’t break when you fold it. You can cook the bacon in the skillet or in the oven or even in the microwave.
- Wrap the bacon slice around the inside of a muffin/cupcake cup making a ring (like in the photo below).
- If your muffin/cupcake pan isn’t non-stick, then put a 1/4 teaspoon of melted butter into the base of the pan – this is just to prevent the egg sticking to the cup.
- Crack the egg into the muffin/cupcake cup – don’t worry, it shouldn’t overflow.
- Sprinkle the grated cheese or place the slice of cheese gently on top of the raw egg and put the pan into the oven for 10-15 minutes. You can check whether the egg is cooked by shaking the pan gently – if the stuff inside wobbles a lot, then it’s not cooked yet, but a small amount of wobble is good. If you like you egg well done, then there should almost be no wobble. Remember to shake very gently! When it’s done, sprinkle a bit of salt and pepper on top and carefully scrap the around the edge of the cupcake cup to detach the bacon from the sides of the cup. Then stick the fork under the egg and lift it up. Place on a salad bed or just devour it by itself.
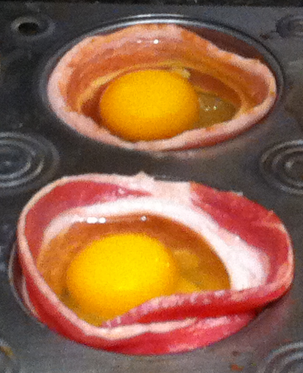
Egg bake preparations – bacon wrapped around cupcake cup with egg
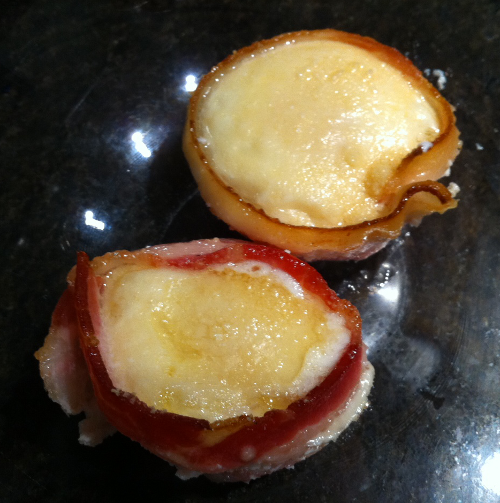
Bacon Egg Bake
Low Carb Pasta
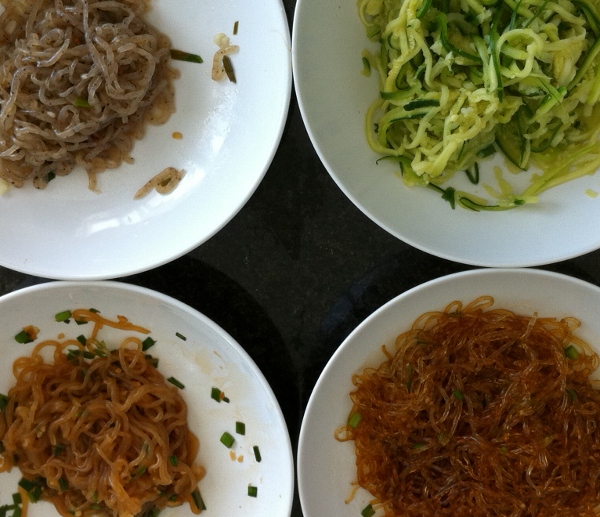
4 Great Low Carb Pasta/Noodles
It’s hard living without noodles and pasta, especially when instant ramen noodles and quick pasta dishes played such an important part of my college life! Here’s 4 noodles/pasta you can eat on a low carb diet – they all have practically no calories and no carbs (the 3rd and 4th noodles are different variations of each other)!
1. Zucchini Noodles Start with 3 zucchinis and a Julienne peeler (kinda like a potato peeler but it cuts everything into thin strands at the same time). Cut each zucchini in half lengthwise, place the flat side down onto your chopping board and start peeling away with the Julienne peeler. It’s easy to use – just pull down like in the photo. You end up with strands of zucchini noodles ready to cook.
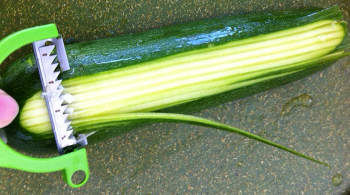
Making Zucchini Noodles using a Julienne Peeler
There are various ways of cooking the zucchini noodles. The easiest is to put a bit of olive oil into a frying pan. Add some minced garlic and chopped chives and then put in the zucchini noodles. Cook in the frying pan for a minute, add salt to taste, drain and serve. Out of the 4 noodles, these were definitely my favorite!
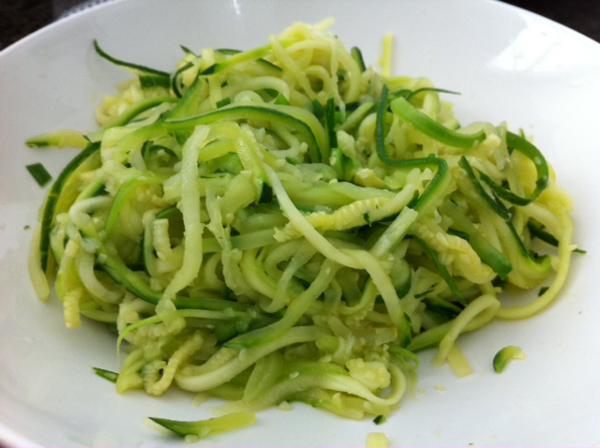
Zucchini Noodles Cooked with Olive Oil, Garlic and Chives
2. Kelp Noodles I picked up this packet of kelp noodles for $2.49 from my local Korean supermarket (H-Mart on 32nd St., New York). Kelps are large seaweeds according to Wikipedia – they’re fat-free, gluten-free, low-calorie (55 cals per 12oz pack, which can serve 2 people) and 0 net carbs (11g of fiber).
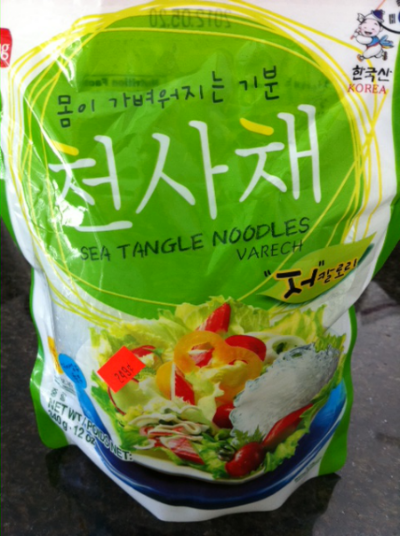
Kelp Noodles from Local Korean Supermarket
The noodles are edible straight from the packet, but are rather crunchy and have no flavor. I washed the noodles in cold water and then squeezed out the excess water. I then added some soy sauce, sesame oil, garlic, and chives, and then mixed it all together in a bowl. I put the bowl into the microwave for 30 seconds on high and poured out any excess liquids afterwards. The noodles were still rather crunchy, but not bad.
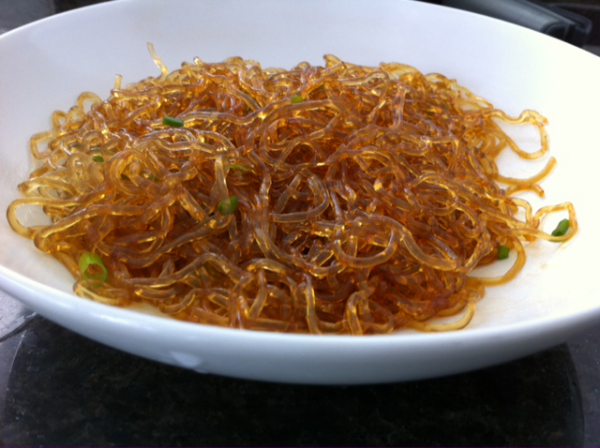
Kelp Noodles Microwaved with Soy Sauce, Sesame Oil, Garlic, and Chives
3. Shirataki Noodles (White) I tried these noodles a while ago as Wholefoods sold them and they had gotten a lot of press as a diet food. They’re made from the root of a type of asian yam (sometimes called konjac or elephant yam), but unlike the yams that we’re used to which contain a lot of net carbs, these so called “yam” plants have pretty much all fiber. Each 1 oz packet contains less than 1g of net carbs and 0 calories. The packet pictured below are white Shirataki Noodles (also called Yam Noodles) that contain no tofu or soy. Some manufacturers make a tofu Shirataki noodle, which as you might have guessed contains tofu. Supposedly, the tofu makes the noodles less rubbery, but it also adds some carbs to the noodles.
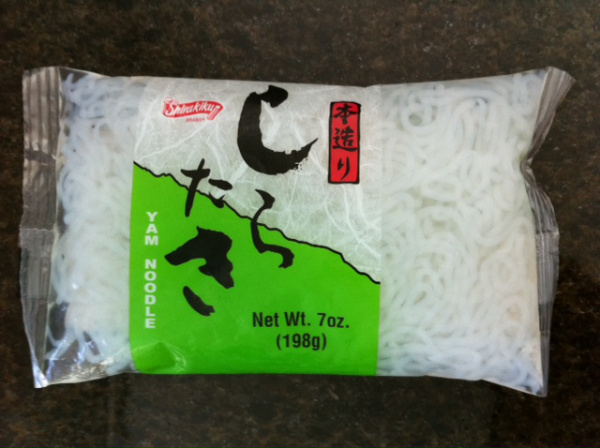
White Yam Noodles
How to cook them? Take them out of the packet and wash them with cold water 3 times. I find the noodles to smell a bit fishy (literally), and so I like to rinse them well. Then place the noodles into the microwave and cook on high for 30 seconds – this helps to get rid of the fishy smell and makes them less rubbery. Rinse again in cold water. Add in soy sauce, sesame oil, garlic, and chives and mix together. Cook again in the microwave on high for 20 seconds. Drain the excess liquid and serve.
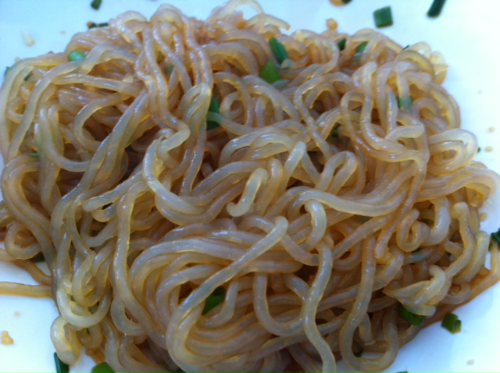
White Yam Noodles Microwaved with Soy Sauce, Sesame Oil, Garlic, and Chives
4. Shirataki Noodles (Brown) These are basically the same as the white shirataki noodles except they have some seaweed food-coloring in them! They taste pretty much the same too and have the same nutritional values – it just adds a bit of variety to our meals.
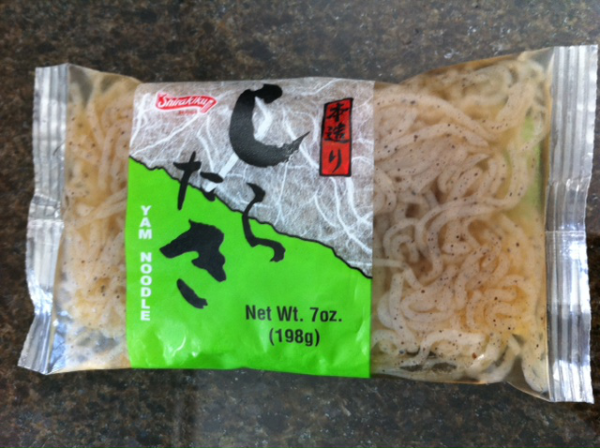
Brown Yam Noodles
More recipes on how to make delicious low-carb meals with these noodles will follow.
A Taste Better Than Just Chicken?
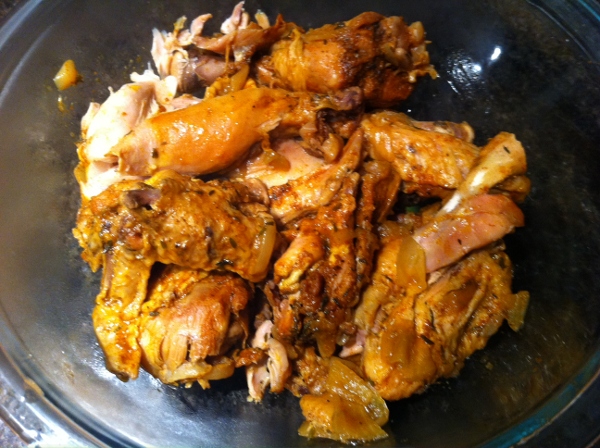
Spicy Fall-off-the-bone Chicken Cooked in a Slow-cooker
I always shy away from the chicken dish at a restaurant, because chicken just tastes like chicken – rather bland and not all that interesting. Part of the problem is that restaurants tend to serve chicken breast, which I’ve always found to be dry and seriously lacking in any flavor. Well, this recipe was amazing – a huge burst of flavor. I found it on food.com, and I’ve so far only made it with drumsticks and wings, but I can’t wait to try it with chicken breasts to see if they can spice them up too! It’s a slow-cooker recipe, which means it’s super easy – but it does require a lot of spices (although you can probably make it with just salt, paprika, cayenne pepper, and onion powder). It’s also a very very cheap dish!
Ingredients (makes 5 drumsticks and 5 wings)
- 5 drumsticks and 5 wings (or you can use a whole chicken or 5 chicken breasts)
- 4 teaspoons of salt
- 4 teaspoons of paprika
- 1 teaspoons of cayenne pepper
- 2 teaspoons of onion powder
- 2 teaspoons of thyme
- 2 teaspoons of white pepper
- 2 teaspoons of garlic powder
- 1 teaspoons of black pepper
- 1 onion
- Mix all the spices together in a bowl to make a rub for the chicken. If you don’t want your chicken to be spicy, then leave out the cayenne pepper and instead add in more onion powder, but note that the paprika will still make it slightly spicy.
- Chop up the onion into approximate half inch squares and place at the bottom of the slow-cooker and add a cup of water so that the onions are barely covered.
- Wash the chicken meat in cold water briefly. Place the washed chicken meat into the bowl with the rub, and rub the spices onto the meat thoroughly – try to get it under the chicken skin if you can. The wings and drumsticks work well here because you can rub the spices under the skin easily.
- Place each piece of chicken covered with the spices into the slow cooker.
- Set the slow-cooker on medium (325F if your slowcooker has a temperature controller), and cook for 5 hours or until the chicken meat falls off the bone (slow cooker times can vary dramatically).
- You can serve the chicken with the bone on or take the bones out since the meat falls off so easily.
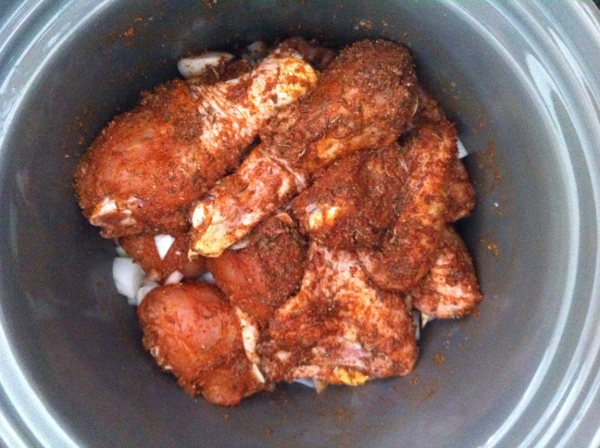
Raw Chicken with Spice Rub in Slow Cooker
Crave Mashed Potatoes? Try Cauliflower Mash
Need some mash to go with those bangers? I found this great recipe for mashed cauliflower on foodnetwork.com and then modified it a touch to make it more buttery.
Ingredients (makes 4 medium portions)
- 1 medium cauliflower
- 1 tablespoon cream cheese (softened)
- 1/4 teaspoon grated Parmesan
- 1/2 of a small clove of garlic (or 1/2 teaspoon minced garlic) (I made the mistake of putting too much garlic on my first attempt by putting in one large clove of garlic, and it was seriously garlicky!)
- 1/2 teaspoon salt
- pinch of black pepper
- 3 tablespoon unsalted butter (softened)
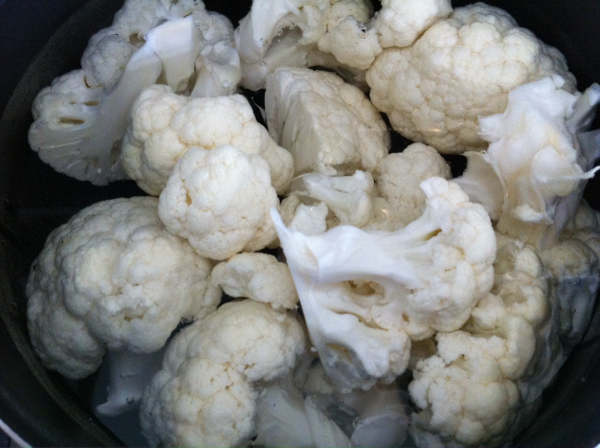
Cauliflower Florets in Boiling Water
- Boil a pot of water.
- Break up the cauliflower into florets and place into the boiling water (see photo above).
- Boil for 8 minutes on high heat (make sure the florets are pretty soft and easy to cut with a fork).
- Drain the cauliflower but do not cool. Instead, dry the florets with some paper towels and place into the food processor.
- Add the cream cheese, grated parmesan cheese, garlic, salt, pepper, and butter into the food processor and blend until it’s pretty smooth (see photo below). This may take a minute or two.
- Ready to serve. You can sprinkle some chives on top to make it look prettier – I mixed it into the mash (see the photo below).
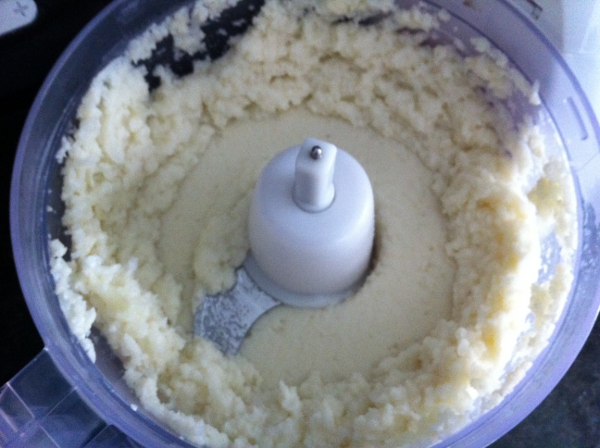
Cauliflower Mash in Food Processor
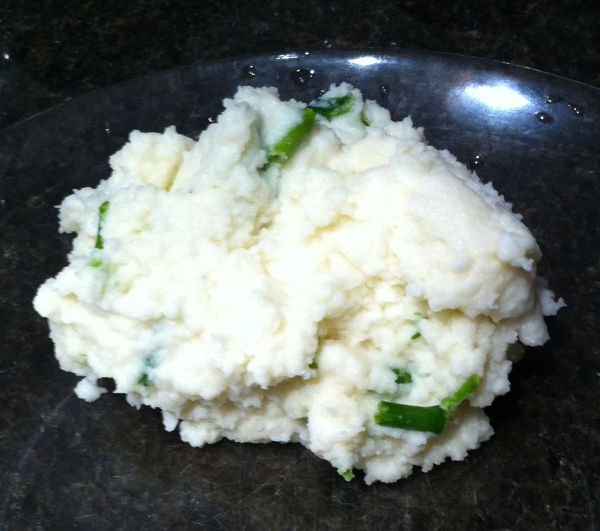
Cauliflower Mash
A Meal for Two in Under 15 minutes!
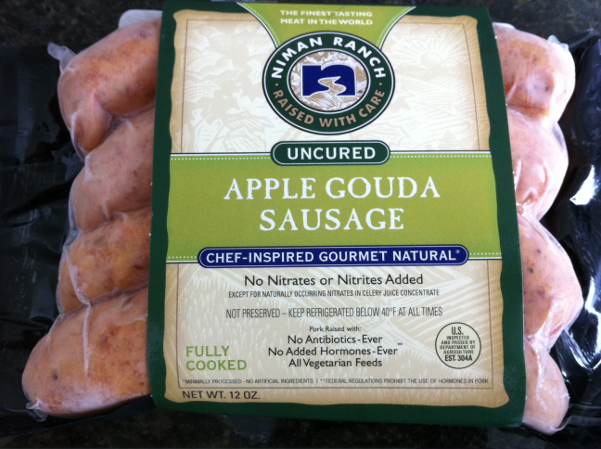
Delicious Apple Gouda Sausages
Sausages are a low-carber’s dear old friends. They’re loyal, simple, down-to-earth and always ready to provide you with a delicious and healthy meal. My favorite sausages are these Apple Gouda ones from Niman Ranch. I know all Americans think that apple goes best with cinnamon, but really it’s apple and gouda that should win the best combo prize! And not only are they tasty, but they’re also healthy (no antibiotics, hormones and your pigs aren’t getting fed other pigs!). There’s a bit of sugar (probably from the apples), but unless you’re having 20 of these sausages a day, you’ll be well within the carb limit for most low carb diets.
“I pick up 3 or 4 packs of these every time I go to Wholefoods”
Wholefoods sells these sausages and various other Niman Ranch sausages for around $6.99 per pack. This may seem pricey, but honestly, I can’t eat more than 2 sausages per meal (and my boyfriend has trouble eating more than 3 per meal). So, one pack of these sausages with some vegetables would make a meal for 2 (which is seriously cheap for New York City). I pick up 3 or 4 packs of these every time I go to Wholefoods, which is about once a week, because Wholefoods sometimes runs out of this flavor. Although Wholefoods sells the sausages in the refrigerated section, I actually put them into my freezer as soon as I get home. They keep for a long time and are easy to thaw out (although you do end up having to cook all 4 sausages in the pack since you can’t thaw them out individually).
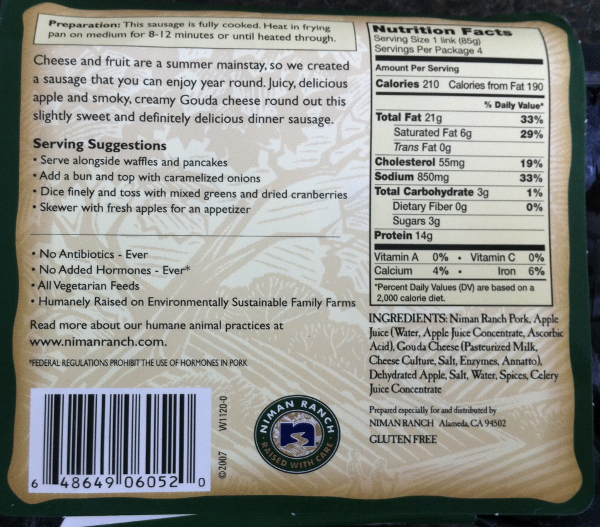
Ingredients list for the Apple Gouda sausages
The cooking instructions on the back of the pack suggest heating in a frying pan, but there are other options obviously. If you have a grill, then that method is great. If you’re lazy, then try just putting it in the microwave (I’ve definitely done that before, and since the sausages are pre-cooked, you don’t have to worry about making sure you don’t get food poisoning from under-cooking them). Unfortunately, I don’t have a grill (a distinct disadvantage of living in NYC), but I still like that charred taste to my sausages, which microwave cooking doesn’t provide. Solution – the broiler (it’s part of most ovens).
“you can have them with some cauliflower mash to create your own version of the British bangers and mash!”
So, after I take the frozen sausages out of the packaging, I put them on a plate and defrost them in the microwave for three and a half minutes so that they’re not frozen rock solid anymore but are still cool to the touch. I then put them onto a sheet of aluminum (I spelled it the American way!) foil on the top rack of the oven and switch on the broiler. If your broiler has a high/low setting, then put it on high. Broil them for 8 minutes but flip them over after every 2 minutes. It takes a bit of effort having to flip them over four times, but the results are worth it. Total cooking time with defrosting is still only 12 minutes (since there’s no preparation required), which makes this a speedy meal to prepare. You can pair the sausages with some sauerkraut, which Wholefoods also sells, for a German meal, or you can have them with some cauliflower mash (faux mashed potatoes) to create your own version of the British bangers and mash!

Sausages cooked using the broiler
Faux Fried Rice
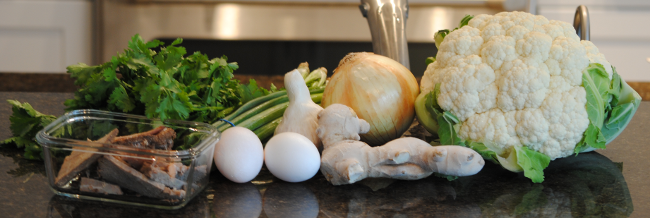 Ingredients for Chinese Faux Fried Rice (One of the Many Faux Rice Variations)
I was very skeptical when I first read about faux fried rice on nomnompaleo, which is a really interesting paleo blog, but it actually tastes amazing and very close to rice. The basis of the recipe is cauliflower chopped up in a food processor to simulate a fake rice look and texture. Personally, I think a more accurate description would be faux cous cous because the cauliflower bits you’re left with are very small. You can add pretty much anything (or nothing) to the chopped cauliflower for your dish (so it can be as simple or as complicated as you want). Below are some recipes I’ve come up with (modifying the basic idea that I got from Nomnompaleo). The first recipe is just a basic faux white rice, and the second is a Chinese fried rice (there’s a Thai version too). Countless other variations are possible!
Basic Faux White Rice (serves 2 adults)
- Half a large cauliflower
- Half a yellow onion
- 2 eggs
- 4 cloves of garlic
- 2 tablespoons of coconut oil (or some other oil or butter)
- Salt to taste
- Chop the cauliflower and onion into small chunks so that it’ll fit into the food processor. Place the chopped cauliflower and onion and the garlic into the food processor with the S-shaped (sabatier) blade and chop until everything is in tiny bits.
- Pour 2 tablespoons of the oil into a pan (any pan will do as long as it’ll fit all the ingredients in).
- Heat the pan on a medium heat.
- After 1 minute, add in all the food processed ingredients. Squeeze out excess liquid (mostly from the onions) if the food processed ingredients seem too soggy.
- Leave the pan with the ingredients in it for 2 minutes. Then crack the two eggs and add them into the pan. Stir the eggs immediately in with the other ingredients so that it doesn’t form large lumps.
- Continue cooking on a medium heat for another 10 minutes stirring every few minutes.
- Add salt to taste.
- Ready to serve. You can have the rice by itself, with some soy sauce, with stir-fried vegetables or meat, or basically with anything you want to have rice with.
Chinese Faux Fried Rice (for Thai Fried Rice, switch the green onions and cilantro for basil)
- Half a large cauliflower
- Half a yellow onion
- 4 green onions (or spring onions or scallions)
- A cup of cilantro leaves (a large handful if you scrunch it up) – try to cut off most of the stalks
- 2 eggs
- 4 cloves of garlic
- Half an inch cube of ginger
- Roast beef chopped into small pieces (I use the slow cooker roast beef because it’s already very flavorful)
- 2 tablespoons of coconut oil (or some other oil or butter)
- Salt and soy sauce to taste
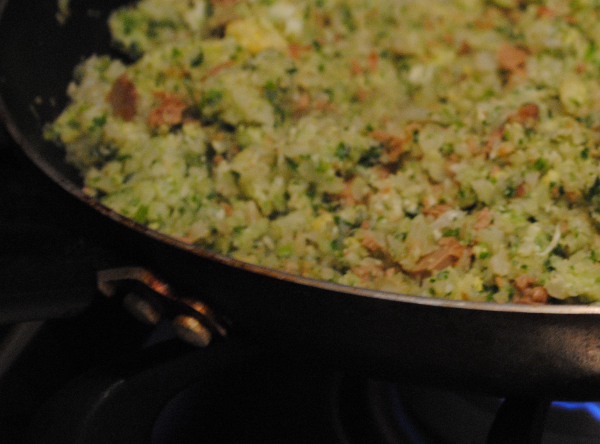
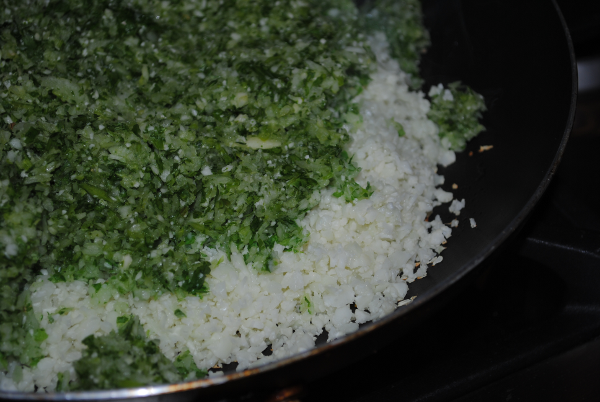 Raw Ingredients in Frying Pan
- Chop the cauliflower, onion, and green onion into small pieces so that it’ll fit into the food processor. Place the chopped cauliflower, onion, and green onions and the garlic and ginger into the food processor with the S-shaped (sabatier) blade chop.
- Pour 2 tablespoons of the oil into a pan (any pan will do as long as it’ll fit all the ingredients in).
- Heat the pan on a medium heat.
- After 1 minute, add in all the food processed ingredients. Squeeze out excess liquid (from the onions and cilantro) if the food processed ingredients seem too soggy.
- Leave the pan with the ingredients in it for 2 minutes. Then crack the two eggs and add them into the pan. Stir the eggs immediately in with the other ingredients so that it doesn’t form large lumps.
- Continue cooking on a medium heat for another 10 minutes stirring every few minutes.
- Add the chopped up roast beef and stir.
- Add salt and soy sauce to taste.
- Ready to serve.
 Ready to Serve Chinese Faux Fried Rice
What Do You Get When Pork and Diary meets Dried Fruit?
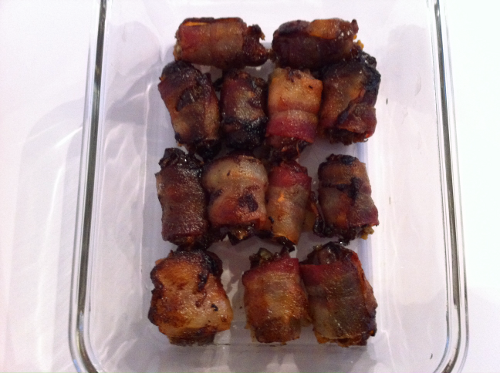
Bacon Wrapped Blue Cheese-Stuffed Dates of course!! I couldn’t stop thinking about these after having them at Traif last weekend. And they are so easy to make as I discovered from an allrecipes.com recipe. They are great as an appetizer or as a quick snack (or even as a dessert I think!). So here’s the recipe:
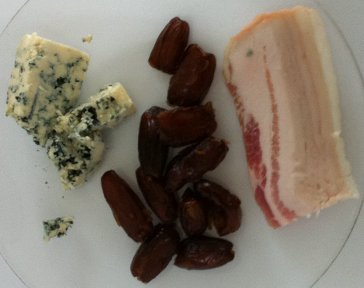
Ingredients (makes 14):
- 14 pitted dates
- 7 slices of bacon (cut each in half to create 14 shorter bacon slices)
- 0.2lbs of blue cheese (I just bought the cheapest one I saw at Wholefoods)
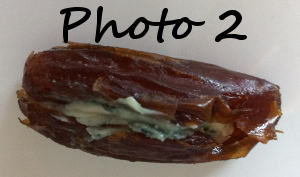
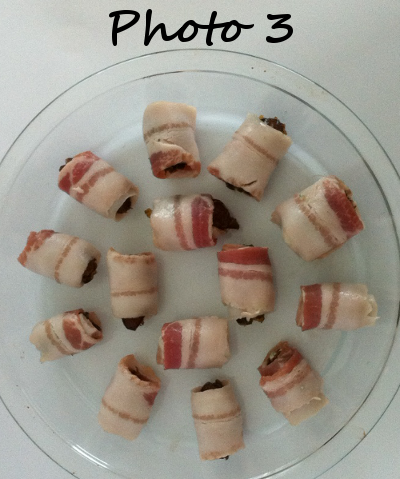
Preheat oven to 350F. Slice each date along one side so that it opens up as shown in photo 1. Fill the date with blue cheese and close it up (photo 2). Wrap one of the half slices of bacon around the date and place in a baking tray with sides (as the fat from the bacon tends to run) (photo 3). Then place the tray in the oven for 20min before flipping the bacon-wrapped dates over (I found tongs useful for this). Cook for another 10min (i.e. for a total of 30min) in the oven.
End Result: Deliciousness!
Veggie in the Belly
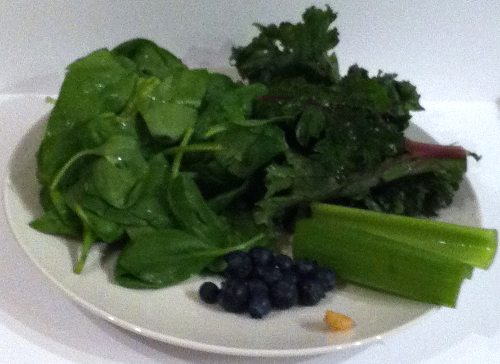
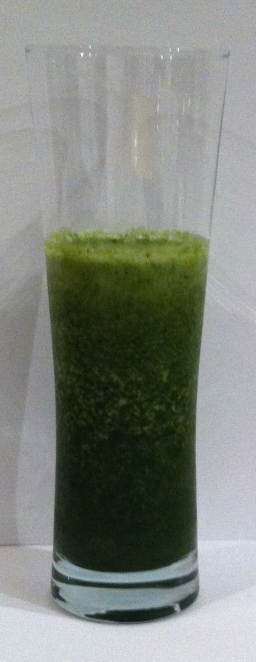
Although I don’t have a strong aversion to vegetables, I’m also not one of those people who can just magically chomp down vegetables like a rabbit. My way of getting all those healthy raw vegetables is to make it into a shake! It’s so simple. I stick everything you see on that plate, a few ice-cubes, and a touch of water or iced tea all into the blender and hit blend. Voila! 10 seconds later, I have a perfectly green and delicious shake. The exact recipe follows after the picture.
Ingredients:
- 10-15 blueberries
- 2 red kale leaves (without the thick stalk at the end)
- 2 handfuls (approx. 2-3oz) of spinach leaves
- 2 3inch celery sticks
- Tiny knob of ginger (approx. 1/4inch by 1/4inch)
- 3oz of water or blueberry iced tea
- Handful of ice-cubes
Place all the ingredients into the blender and blend well. You might have to gently shake the blender a bit for the veggies to shift down and become blended. Alternatively, stop the blender and push the remaining veggies down with a spoon. You can also add in a scoop of protein powder for an extra nutritious shake.
I know the shake doesn’t look all that appetizing because it’s green, but honestly, what did you expect? I did add in a bunch of green vegetables!
Sweet Chocolate Praline
I cheated on my diet last Thursday – I just couldn’t keep it up any longer! I had scones, cake, cupcakes, pear cider, and donuts all in 6 hours! It was quite impressive, and I was actually amazed by how I didn’t feel too horrific the next day. But since Thursday, my sugar and cake cravings have definitely been awakened. I actually spent a night dreaming about eating two-bite brownies (you can get them at Costcos and Wholefoods as well as various other stores). I remember just eating them one after another, two bites per brownie! This has spurred me to make more chocolate, and this time, sweeter chocolate. So, here’s a quick and simple modification to the chocolate almond dessert recipe: switch one piece of the Baker’s unsweetened baking chocolate for a piece of the same size of 75% chocolate or just use 85% chocolate for the whole thing. Watch this space for my next chocolate modification…the addition of Splenda. Some dieters discourage it still, but the health effects appear to be very minimal – read my post about artificial sweeteners for more info.
