Apple Cinnamon Muffins
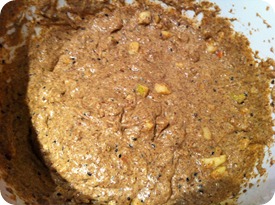
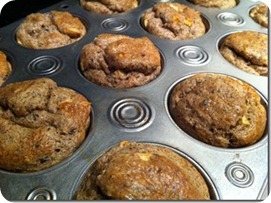
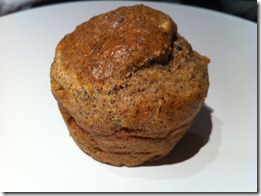 It would be wrong of me to go on about these delicious low carb muffins (gluten-free and grain-free) without giving you the recipe for them! So, it’s below… The muffins are 2g net carbs each and are really moist and full of flavors because of the spices and apple chunks in them. I keep them in the fridge and microwave one for 10 seconds on high to warm it up. They’re really convenient to take with you as breakfast or as a quick snack. You can try making them with other flavors, but I’ve generally found that apple and cinnamon go really well with artificial sweeteners (i.e. you can’t tell that it’s not real sugar!), whereas chocolate is really bad at hiding artificial sweeteners.
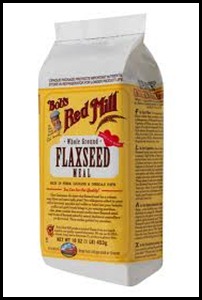
These muffins are flaxseed meal and almond meal based. You can either buy bags of flaxseed meal and almond meal (Wholefoods and a lot of larger grocery stores and health stores generally carry Bob’s Red Mill brand pictured below or you can buy it online at Amazon.com) or you can make your own by placing flaxseeds/almonds into a food processor or blender (the almonds can wear down the blade in your blender/food processor quickly). I generally make my own as it’s much cheaper to buy flaxseed and almonds unprocessed, but if you’re just starting to try low carb baking, then you might want to start with a small bag of flaxseed meal and of almond meal and see how you like the muffins before buying them in bulk. The other essential ingredient in low carb baking is coconut flour, and my next muffins post will on that!
Ingredients (makes 12 muffins)
- 1 cup of flax meal
- 1 cup of almond meal
- 1 tablespoon of black sesame seed (optional)
- 1 tablespoon of baking powder
- 1/4 teaspoon of salt
- 1 and 1/4 teaspoons of nutmeg
- 1 teaspoon of sugarfree vanilla extract
- 1 teaspoon of cinnamon
- 1 teaspoon of orange zest (optional)
- 1 cup equivalent of artificial sweetener
- 1/2 cup of butter, melted
- 4 eggs, beaten
- 1/3 cup of almond milk (can substitute water)
- 1 small apple, diced
Equipment: muffin/cupcake pan
Directions
- Preheat oven to 350F (175C).
- Grease muffin/cupcake pan with coconut oil or butter (ignore this step if you use muffin cups).
- Mix ingredients together and whisk well.
- Fill each muffin/cupcake cup to around 3/4 of the way.
- Bake for 20 minutes and cool before removing.
I’ve noticed that the muffins do shrink a bit once they cool, and they don’t look as fluffy as regular muffins, but they are deliciously moist even on reheating and much much healthier. In fact, I think these are better than many regular full carb muffins! Let me know what you think of the recipe and what variations you’ve tried.
New Year’s Resolution–Cook More
 2012 is going to the year when I unleash my cooking potential! Already this year, I have made 3 new dishes (2 low carb desserts) and bought enough food that my refrigerator is staring to groan. However, I’ve made enough resolutions to know that 2 weeks is the average amount of time before the resolution crumbles and then collapses into a distant memory of yet another failure.
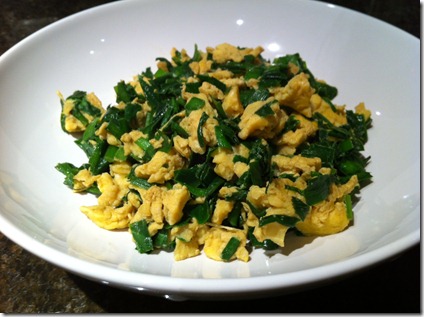
So this year, I’m going to help my lack of perseverance along a bit. Instead of just saying I’ll “cook more,” I’m going to be a bit more definite – I am going to cook at least twice a week. I’m also going to make more simple dishes, so that cooking doesn’t eat into my evenings too much. To kick start this new resolution, I made a really simple dish tonight. It took me all of 15 minutes and was delicious. The recipe for the so-simple-even-you-can-make-it eggs and Chinese chives stir-fry is below, but first, let me explain what Chinese chives are and why they are so amazing!
 Chinese chives look a bit like tall grass (see the photo on the right), but they have a very distinct fragrant smell and taste. Although they are similar to normal chives, they have a much stronger taste. It’s hard to describe the taste since it’s quite unique, but it’s probably something close to that of a leek with the sweetness of green onions and a touch of garlic. Doesn’t that sound delicious already?? Unfortunately, you can only find Chinese chives in Asian supermarkets, but you can substitute leeks or regular chives for the Chinese chives.
Ingredients (makes 2 servings)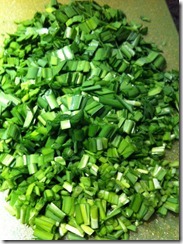
- 4 eggs, beaten
- 1 and 1/2 lbs of Chinese chives (or leeks or regular chives), chopped into 1/2 inch segments
- 2 tablespoons of coconut oil (or other cooking oil)
- 2 tablespoons of soy sauce
Directions
- Pour 2 tablespoons of oil into a frying pan.
- Add the eggs and scramble them.
- When the eggs are cooked, add the chives and cook for 7 minutes on medium heat stirring every few minutes until the chives look wilted.
- Add the 2 tablespoons of soy sauce and stir.
It’s a great dish to have for breakfast, lunch, or dinner. And it’s easy and super quick to make! I wish all recipes were so simple!
Low Carb Pizza
| Low Carb Pizza |
- 3 tablespoons of flax meal (you can make your own by grinding flax seeds in a blender or coffee grinder)
- 2 tablespoons of parmesan cheese
- 1/4 teaspoon of baking powder
- 1 egg
- 2 teaspoons of water
- 1 teaspoon of olive oil
- 1/4 teaspoon of garlic powder
- 1/4 teaspoon of onion powder
- 1 teaspoon of Italian seasoning (or just throw in a bit of basil, oregano, rosemary, thyme, and marjoram or whatever you have handy!)
- 1/2 teaspoon of salt
- Crust:
- Mix all the ingredients together in a bowl until there are no lumps of flax meal or parmesan cheese.
- Grease a microwavable plate that’s larger than 8-inches in diameter (i.e., most dinner plates) with some olive oil (using a paper towel to smudge it around the plate) or use a spray.
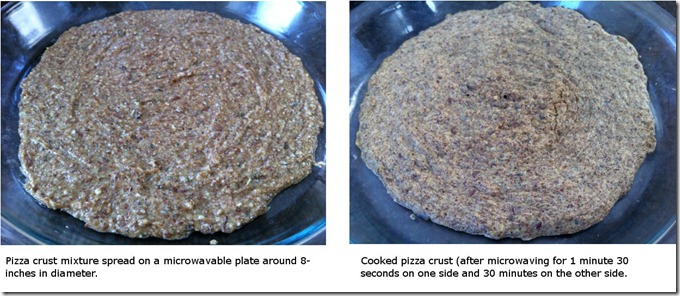
- Scoop mixture onto a plate. Spread the mixture in a circular motion using the back of a tablespoon until you create a flat disc around 8-inches in diameter. Make sure the dough isn’t broken in places as you don’t want holes in your pizza crust!
- Microwave for 1 minute 30 seconds on high. Flip it over carefully using a spatula and microwave on high for another 30 seconds.
- If you want the crust to be harder, then you can fry it. Just put a teaspoon of olive oil into a flat frying pan and fry each side for 2 minutes or until you think it’s hard enough. I’m lazy and am ok with a soft crust for the pizza.
- To cook the pizza (after putting sauce and toppings on – see below for those), heat the oven to 350F and bake for 15 minutes.
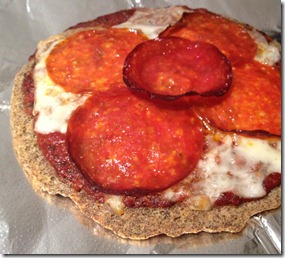 I always thought low carb pizza was some sort of myth (closely akin to unicorns and the Yeti) until I saw this recipe on Linda’s genaw.com. This recipe (which is below) makes individual 8-inch pizzas and is simple to make. The crust is made from a mixture of flax meal and parmesan cheese, which you cook in the microwave in just 2 minutes! Then for the sauce, you can go really easy and just use store-bought pizza sauce or make your own homemade pizza sauce using the recipe below (which just involves mixing some ingredients together and no cooking). I really like the sauce and recommend making it (it has very few carbs and tastes great). The recipe for the sauce makes a fair amount of sauce – enough for 8-10 pizzas (I found the recipe on allrecipes.com – it looked so simple to make and got great reviews from nearly 300 reviewers).
Ingredients to make 1 crust :
- 3 tablespoons of flax meal (you can make your own by grinding flax seeds in a blender or coffee grinder)
- 2 tablespoons of parmesan cheese
- 1/4 teaspoon of baking powder
- 1 egg
- 2 teaspoons of water
- 1 teaspoon of olive oil
- OPTIONAL INGREDIENTS
- 1/4 teaspoon of garlic powder
- 1/4 teaspoon of onion powder
- 1 teaspoon of Italian seasoning (or just throw in a bit of basil, oregano, rosemary, thyme, and marjoram or whatever you have handy!)
- 1/2 teaspoon of salt
Directions:
- Mix all the ingredients together in a bowl until there are no lumps of flax meal or parmesan cheese.
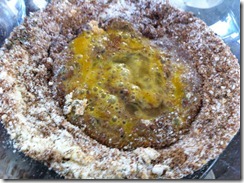
- Grease a microwavable plate that’s larger than 8-inches in diameter (i.e., most dinner plates) with some olive oil (using a paper towel to smudge it around the plate) or use a spray.
- Scoop mixture onto a plate. Spread the mixture in a circular motion using the back of a tablespoon until you create a flat disc around 8-inches in diameter. Make sure the dough isn’t broken in places as you don’t want holes in your pizza crust!
- Microwave for 1 minute 30 seconds on high. Flip it over carefully using a spatula and microwave on high for another 30 seconds.
- If you want the crust to be harder, then you can fry it. Just put a teaspoon of olive oil into a flat frying pan and fry each side for 2 minutes or until you think it’s hard enough. I’m lazy and am ok with a soft crust for the pizza.
- To cook the pizza (after putting sauce and toppings on – see below for those), heat the oven to 350F and bake for 15 minutes.
Ingredients to Make Pizza Sauce (good for 8-10 pizzas):
- 1 can (6oz) of tomato paste
- 1 and 1/2 cups of water
- 1/3 cup of olive oil
- 2 cloves garlic, minced
- 1/2 tablespoon of dried oregano
- 1/2 tablespoon of dried basil
- 1/2 tablespoon of dried rosemary (crushed – I just used my fingers to crumble some)
- Alternatively (instead of oregano, basil and rosemary, you can just put 1 and 1/2 tablespoons of Italian seasoning).
- 2 teaspoon of salt (0r to taste)
- 1/2 teaspoon of pepper (or to taste)
Directions:
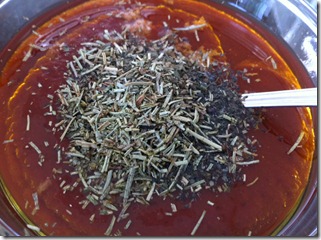
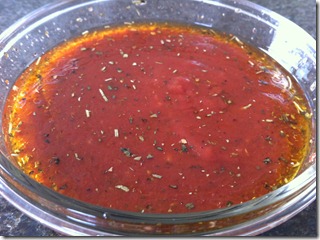
- Mix everything together well. Best used after it’s been left to stand for a few hours, but it tastes pretty good even if you use it straight away.
The photos below show me about to mix all the ingredients and after it’s mixed.
Toppings:
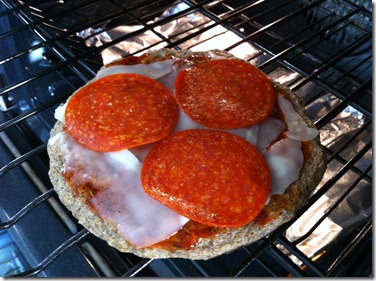
I put a few slices of mozzarella and pepperoni on top, but you’re welcome to pick your own toppings. Here’s one last photo, which shows the pizza about to go into the oven.
Butternut Squash Soup
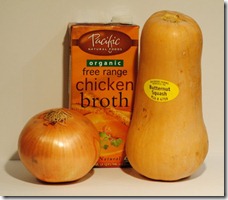 Winter has most definitely set in again (unless you’re in the southern hemisphere, in which case, I truly envy you right now!). This weekend has been literally freezing in New York, so I decided to keep warm with some butternut squash soup, which is both delicious and easy to make!
Those 3 ingredients you see pictured on the left are pretty much all you need! (In addition, a blender, a food processor, or an immersion blender – which is the best one to use – is also crucial to create that smooth soup texture.)
Ingredients (4 servings)
- 1 chopped onion (I used half of the one in the photo as it was a really large onion)
- 32oz (4 cups) chicken broth
- 1 butternut squash
- 1 tablespoon of coconut oil (or dab of butter)
- salt to taste
- nutmeg and pepper (optional)
Directions
- Chop the onion (no need to chop it particularly finely).
- Add 1 tablespoon of coconut oil (or butter) to a large pot (large enough for more than 8 cups of liquid) and add the chopped onions. Sauté the onions on low heat until they turn transparent (5-10minutes).
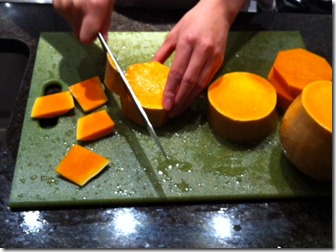
- While the onions are cooking, chop up the butternut squash. I cut it into 1-inch thick slices and then take off the skin by chopping it off (see photo below). Then I cut the squash into roughly 1-inch cubes.
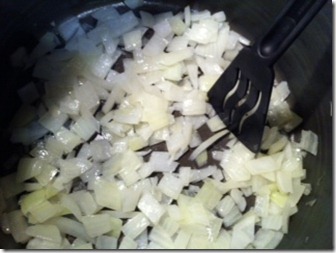
- When the onions turn transparent (the onions have turned transparent in the photo below), pour in the 32 ounces of chicken broth. Then add the chopped squash and simmer on a medium heat for 1 hour.
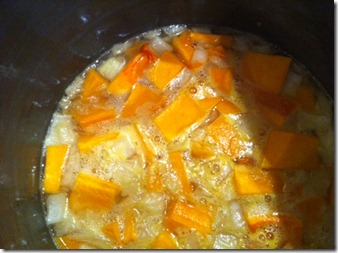
- Now comes the hard part. If you have an immersion blender, then stick it into the pot and puree the cooked veggies to create the soup. (Try to keep the end of the stick immersed in the soup to prevent too much splashing.) If you don’t have an immersion blender, then you’ll need to take the softened veggies (squash and onions) out of the pot, without the liquid, and place it into a blender or food processor to puree.
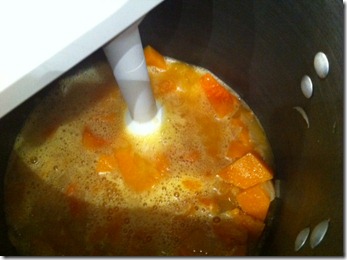
- Once pureed, season with salt. Try a bit of the soup to see how much salt you want. If the butternut squash you used was very ripe, then your soup may be sweeter and therefore you might want less salt. You can also add pepper and nutmeg.
- Cook for another half hour and serve.
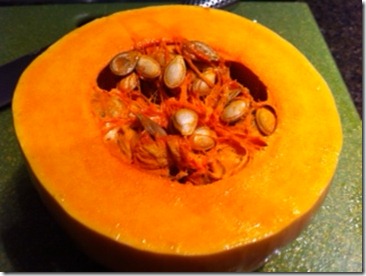
Added Bonus: When you were cutting up the butternut squash, you probably noticed all those seeds inside of the squash. If you scoop these out (I use my hands) and wash them clean, you can then cook them for 30min in the oven at 350F on a piece of aluminum foil and eat them whole as a crispy snack.
If you don’t like butternut squash, you can substitute sweet potatoes (or Japanese yams) or pumpkin, or you can mix it up. I’ve made the soup before with a butternut squash, 2 Japanese yams and a can of pumpkin puree (in which case I needed 64oz of chicken broth).
Note: butternut squash is one of the more starchy squashes (1 cup = 18g net carbs), and it isn’t permitted on the Atkins diet until the later stages. It is however permitted on primal and paleo diets, and many low-carbers are ok with eating butternut squash, yams, and pumpkins as long as you don’t go overboard!
Spaghetti and Meatballs
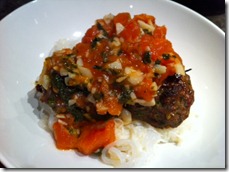 Following up on my low carb pasta post a few months ago, here’s a recipe for a nice low carb meal of spaghetti and meatballs (using shirataki or zucchini noodles). I’d start by making the meatballs (you can make these in advance and then heat them up later). Everything is freshly made except for the shirataki spaghetti, which you easily purchase at Wholefoods or at various supermarkets (most Korean supermarkets sell a variety of them).
Meatballs: Ingredients (makes 16-20 meatballs)
- 2lbs pork tenderloin or other lean cut of pork minced or beef or turkey or whatever type of meat you want to use in a food processor (you can buy ground meat, but I prefer to grind my own, since I then know exactly what is going into it)
- 1 cup chopped green onions
- 2 eggs, beaten (this holds the meatballs together)
- 2 tablespoons of garlic powder (or granulated garlic)
- 3 tablespoons of salt
- (Optional) 2 tablespoons of thyme
- (Optional) 2 tablespoons of fennel seeds (I particularly like to use fennel seeds with beef, but they add a lot of flavor with all meats)
- Preheat oven to 350F.
- Beat the eggs and food process the pork so that it’s minced.
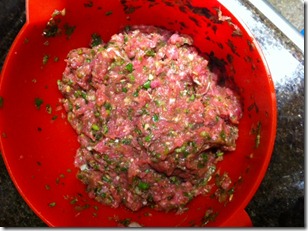
- Mix all the ingredients together in a large bowl (I use my hands to do the mixing).
- Shape meatballs with your hands into 1 to 1.5 inch diameter balls (size of a golfball or a little bit bigger), and place them on a non-stick baking tray (no need to grease it). It makes around 16-20 meatballs, depending on how big you make them.
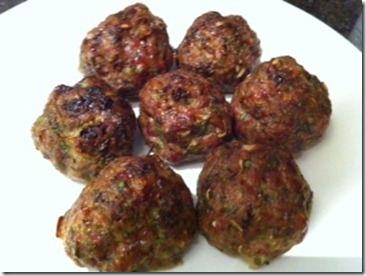
- Put it in the oven and cook for 45 minutes (ovens and sizes of the meatballs can differ and so the cooking time can vary – I would cut one in half to make sure the meat is cooked all the way through).
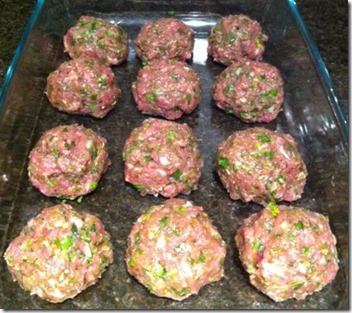
- (Optional) You can brown the meatballs a little by putting them under the broiler for 2 minutes after they’re cooked.
Tomato Sauce: Ingredients (makes 2 servings)
- 1 tablespoon olive oil
- 8 cloves of garlic, minced
- 1/4 cup of chopped basil
- 3 tomatoes, peeled, seeded and diced (I would recommend using the serrated peeler to peel the tomatoes – the pack of 3 peels also comes with a julienne peeler, which is perfect for making zucchini noodles)
- 1/4 cup white wine
- 1/2 cup chicken broth
- salt and pepper to taste (I put in 1.5 tablespoons of salt and a pinch of pepper)
Tomato Sauce: Directions
- Place the olive oil in a large frying pan at medium temperature.
- Put the minced garlic into the oil and fry for 5 minutes without browning it.
- Add the tomatoes, basil and cook for another 2 minutes.
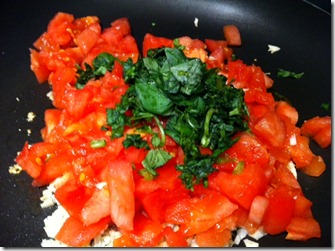
- Add the white wine and the chicken broth and cook for around 10-15 minutes on medium heat (so that it’s simmering) until the sauce is less liquid-y.
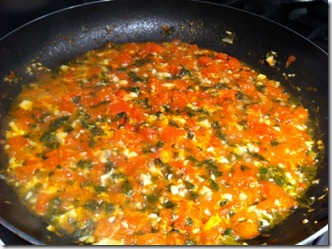
Putting It All Together:
If you’re making zucchini noodles, then you should use a julienne peeler to create the noodles (see low carb pasta post for directions) and then cook the zucchini noodles for 30 seconds on high in the microwave. If you’re planning to use Shirataki (miracle) noodles, then rinse them in cold water and then place them in the microwave for 30 seconds on high to get rid of any excess water. Since both types of pasta are pretty much carb-less and calorie-less, you can pretty much use as much as you want (I recommend 1 zucchini per serving or 1 packet of Shirataki noodles per serving just so you don’t run out of sauce).
Place the pasta on the bottom of a bowl, place 3 meatballs on top, and then pour the sauce onto it.
I calculated each meatball at around 90 calories (for 1.5inch diameter pork meatballs) and 130 calories for each serving of sauce. So for a bowl of 3 meatballs plus the sauce and pasta, it’s around 400 calories. The meatballs have negligible carbs and each serving of sauce has around 4g net carbs (mostly from the garlic and tomatoes). All-Paleo for those of you who care.
Tuna Fish Salad
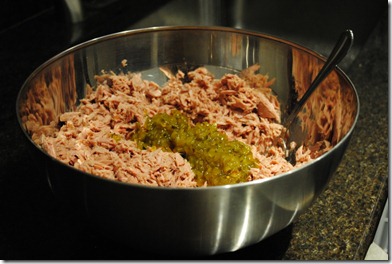
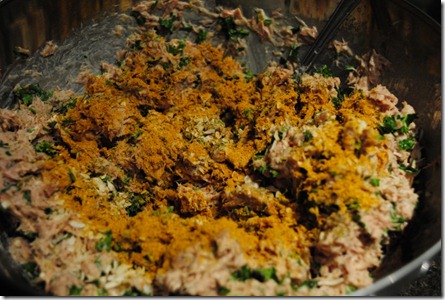
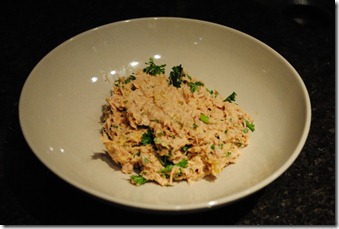 I used to hate tuna fish, and even now I still don’t eat much tuna fish, despite the fact that I generally love seafood. I find tuna fish dry and odd tasting, so the only way I’ll eat tuna fish is in the tuna salad pictured to the left. It’s based on a recipe that I found on allrecipes.com (Barbie’s Tuna Salad), but I’ve modified it slightly to lower the calories and make it taste even better. I use light mayo (Smart Balance, which is low fat and low calorie), less sweet pickle relish and no parmesan cheese (I couldn’t taste it at all!) to cut down on the calories. I also put in less dill and more curry powder than the original recipe calls for (my version is below, of course). All in all, it’s a delicious tuna salad that’s full of protein, is low in carbs, and is relatively low in calories. I make it by the bucket load, so that I have enough to eat for at least a week – Costco sells tuna in 5lb tins, and each tin makes a huge mixing bowl-full that takes me around a week to finish eating.
Here’s my recipe:
Ingredients:
- One 5lb can (or around ten 7-ounce cans or fourteen 5-ounce cans) of tuna in water (I use the chunk light tuna as I find the white tuna to be too dry) – drain the tuna and flake it thoroughly with a fork
- 1 and 1/4 cups of light mayo (I use Smart Balance Plus Omega)
- 10 tablespoons of sweet pickle relish (this does have some sugar in it, but makes the tuna salad taste so much better!!) I’ve tried substituting this for zero-sugar pickle relish or just omitting it altogether, but the recipe just doesn’t work without it.
- 3 tablespoons dried onion flakes (this gives the tuna fish a bit of a crunchy texture)
- 2 and 1/2 tablespoons of curry powder (this is absolutely key in this recipe, but don’t worry – it doesn’t make it taste like curry…it just gives it that hint of curry flavor, which adds so much more dimension and deliciousness to this tuna salad)
- 1 cup of freshly chopped parsley (you can chop it by hand or in the food processor for a more thorough chop) – the original recipe calls for dried parsley, which you can’t really taste, and so I prefer to use fresh parsley
- (Optional) 3 tablespoons of dried dill weed (I don’t really like the taste of dill, and luckily you can’t really taste it the tuna salad, but if you prefer more of a dill taste, you can decrease the amount of parsley and increase the amount of dill or use fresh dill and dried parsley)
- (Optional) 2 tablespoons of granulated garlic (or garlic powder) – it adds just a bit of subtle flavor
Directions:
This is the simple part – just put everything in a large bowl and mix well (make sure all the tuna is well flaked so that the flavors can mix in with it).
This takes around 20 minutes to prepare. I would say it makes around ten 8-oz servings, and each serving contains around 250 calories.
You can obviously scale the recipe down if you don’t want to make so much tuna in one go, but just be careful to do the calculations correctly.
Winter Melon Pork Spare Ribs Soup
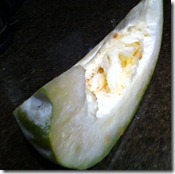 The weather has been amazing this weekend, but I know that winter is just around the corner. It therefore seems very apt to start cooking some winter melon. If you’ve never heard of winter melon, then you might know it instead as white gourd (note: fuzzy melon is not the same thing although it can look similar). Still doesn’t sound familiar? Well, it’s a vegetable that can grow as large as a pumpkin but has green colored skin with a white coating, and although it’s called a “melon,” it’s not sweet, and people generally eat it cooked rather than raw.
If you’ve never heard of it, part of the reason is likely because winter melon is typically grown in Asian countries. Consequently, the easiest place to find it here in the U.S. is at your local Asian grocery store. In China, winter melon is used in a variety of recipes, but one of the best and most popular is a soup that just happens to be very locarbolicious! The recipe details are below, but generally the soup consists just of winter melon and pork spare ribs. Believe me (partially because I just ate some soup tonight) – this soup is delicious and offers a nice combination of meat and vegetables as well as some warmth during the winter months! Here’s the simple recipe:
Ingredients (makes 4 servings)
- 2lbs of pork spare ribs chopped up into 2-inch long small ribs (I ask the butcher to cube it for me – it’s much easier and quicker that way). If you don’t have or like pork spare ribs, you can substitute beef ribs or other red meats, but preferably always with bone in the meat. You can buy pork spare ribs in most large Asian supermarkets (or I got it at my local butcher’s shop in New York, Esposito’s Pork Shop, on the corner of 38th and 9th Ave).
- 2-3lbs winter melon chopped into 1 inch cubes (you can usually buy just a slice of winter melon like the slice pictured above) – I bought this in Chinatown.
- 1 tablespoon of coarsely chopped fresh ginger.
- 3 tablespoons of chopped spring onions.
- 1 teaspoon of Sichuan peppercorns (easy to get in Asian supermarkets or online).
- 3 star anise (easy to get in Asian supermarkets or online).
- a spice or tea infuser (a small metal mesh container that allows the spice flavors to disperse into the soup without the spice itself being left in the dish – it’s a hassle picking out the peppercorns and star anise in soup, so I like to put them all into the infuser and just submerge the infuser in the soup).
- 2 tablespoons of salt.
- 1/4 cup of coarsely chopped cilantro (to add at the end).
Directions
- Place the 2lbs of pork ribs into a large pot and add cold water until it covers the ribs. Cook the ribs until the water boils, then pour out the water. This just rinses any blood from the meat.
- After pouring out the first load of water, add around 8 cups of fresh cold water into the pot (if you want more soup then add more water). Make sure there’s enough water to cover the ribs and that there’s space in the water for the winter melon too!
- Add the 2 tablespoons of salt, the 3 tablespoons of chopped spring onions, and the 1 tablespoon of coarsely chopped fresh ginger to the pot.
- Place the Sichuan peppercorns and star anise into the infuser and drop the infuser into your pot.
- Cook for an hour on a medium heat with the lid on if you have a lid to the pot (the water should be just boiling/bubbling a little).
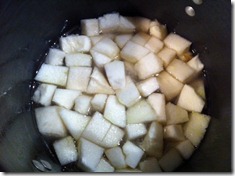
- Add the chopped winter melon into the pot and cook for another 45 minutes with the lid on or until the melon looks translucent and is soft and easy to cut with a fork.
- Ready to serve – put 2 or 3 pieces of ribs into a bowl with some of the broth and 6 or 7 pieces of the melon.
I was planning to take a nice photo of the soup all pretty in the bowl, but it was so good that I completely forgot about the photo (this happens a lot actually!). Oh well, I will put up a photo next time I make the soup!
Pulled Pork with Zero Carb BBQ Sauce
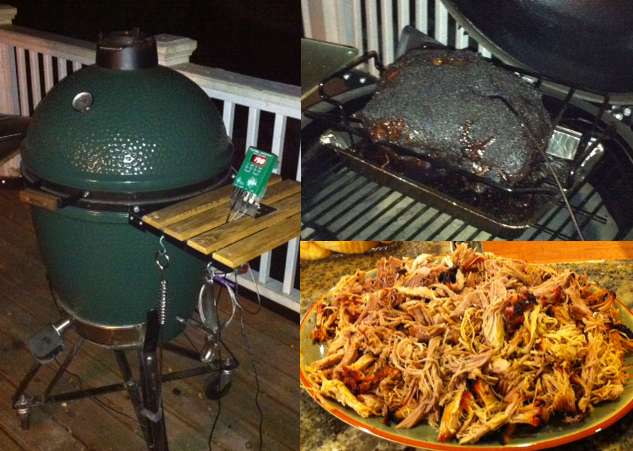
A Green Egg and the Delicious Pulled Pork that Came Out
I had pulled pork cooked in an green egg a few weeks ago at a friend’s house in Georgia. A green egg? It’s a high end ceramic charcoal cooker that keeps temperatures regulated throughout the cooking process and it’s shaped like a green egg (see photo). It tasted delicious, but unfortunately, the green egg costs over $1,000, requires a deck or balcony (which is impossible in NY), and takes 8 hours of monitoring. Instead of all that, I just use my handy slow-cooker. And what about the BBQ sauce? Aha – this is where it gets exciting…Zero-calorie delicious BBQ sauce – keep reading and all will be revealed.
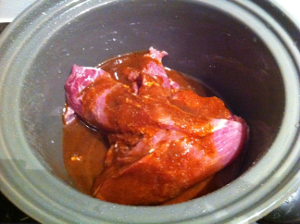 Instructions for Cooking the Pulled Pork:
- Get some pork butt or pork shoulder and place it into the slow cooker. (The photo shows 3lb of pork butt.)
- Pour some sea salt into the pot (2 tablespoon for 3lb).
- Add 1 cup water.
- Optional: add some garlic and onion powder and some of the zero-calorie zero-carb BBQ sauce (see below).
- Cook on low (300F) for 10-12 hours (it’s ready after around 8 hours, but I like it super tender).
- Shred using two forks.
Zero-carlorie, Zero-carb BBQ Sauce:
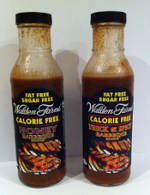 There are 2 incredible parts to this secret sauce:
FIRST, Walden Farms makes these amazing zero-calorie zero-carb dressings and sauces (and even a chocolate dip). You can buy it off Amazon for $3.99 plus shipping or at random little stores like the one on the corner of 9th Ave. and 36th St. without the shipping. There are 4 flavors, and I’ve tried 2 so far: Honey and Thick N’ Spicy. Ok, if you’re reading their reviews on Amazon or you’ve tried it, it’s not exactly amazing. The Thick ‘N Spicy is pretty good if you can handle a lot of spice. The Honey isn’t spicy, but you can taste the fake sugar in it. But, if you add the second part of this secret sauce, it transforms….
 SECOND, Crystal Hot Sauce, which you can buy from Amazon for $7.99 and free shipping. It may not sound that amazing, especially since the ingredients are so simple: Aged Red Cayenne Peppers, Distilled Vinegar, Salt. But, it is just that…amazing. It adds so much flavor without being too spicy. I love spicy food, but I can’t take huge amounts of spice, so this is perfect.
The trick is to combine the Crystal sauce with the Walden Farm Honey BBQ and then adding a touch of salt. The hot sauce flavor completely covers up the fake sugar taste in the BBQ sauce so that you’re simply left with a delicious sauce! Pour onto your pulled pork, or pulled chicken or whatever meat you want. Zero calories. Zero Carbs. I could write something very cheesy right now, but I’ll stop here.
Low Carb Breakfast – Coconut Pancakes
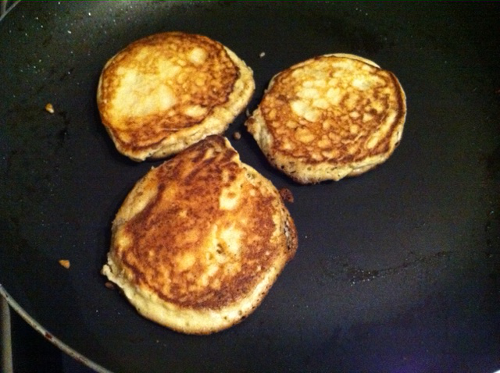
Low Carb Coconut Pancakes
I’m actually more of a fan of the French crepes (which I once heard an American call “creeps”) rather than the thick pancakes that you’re used to finding at brunch and in diners, but they start to taste super good when you can’t eat cake or any other desserts! I’m sure the low carb diet would never have taken off if the wonders of coconuts hadn’t been discovered. We drink the milk, make cookies from the flesh, and now make pancakes from the flour! And these pancakes sure seem popular with low-carbers! I found an abundance of different recipes, but I thought this recipe from nourishingdays.com was pretty easy and tasted super good! I made a batch of 10 pancakes and stored them in the fridge – delicious for breakfast!
Ingredients (makes 10 small pancakes):
- 4 eggs
- 1/2 cup coconut flour
- 1 cup coconut milk (from the cans, not the cartons – make sure it doesn’t have added sugar and it isn’t the “light” stuff. Also shake the can before opening as the cream and the water separates.)
- 2 teaspoons vanilla extract (make sure you buy a brand that has no added sugar)
- 3 drops of liquid sucralose or 1/2 teaspoon of Stevia
- 1 teaspoon baking soda
- 1/2 teaspoon (sea)salt
- coconut oil or butter for cooking
- Beat the eggs; add in the coconut flour, coconut milk, vanilla, baking soda, salt, and sucralose/stevia. Mix well.
- To cook these pancakes, you can use a griddle, or if you don’t have one like me, you can just use a frying pan. Put some coconut oil or butter to grease the pan and put the pan on a low heat.
- Ladle some of the batter into the pan (to form a 3 inch diameter circle). The pancake should be thick so don’t try to make the batter spread out. If you’re using a large enough frying pan, you can cook 3 or 4 pancakes at the same time.
- Cook for 2 minutes and then flip. Continue cooking and flipping until both sides are brown.
- The pancakes are a bit dry by themselves, so have it with some butter or coconut oil or else some fruit.
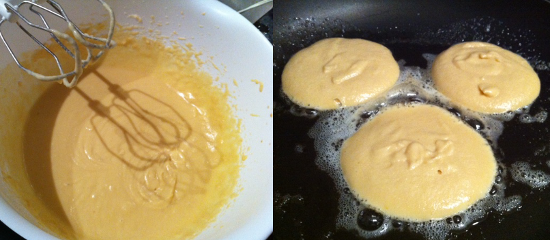
Low Carb Coconut Pancakes Batter in Mixing Bowl and in Frying Pan
Nutritional Information
For one pancake: Calories = 151 Fat = 11g Carbohydrate = 9g (5g fiber, 0.4g sugar) Protein = 4g
Low Carb Cereal
Update: I got tired of the No Low Carb Cereal situation I originally wrote this post about and created my own Low Carb, No Grains/Gluten, No-Added Sugar Breakfast Cereal (it’s 100% all-natural and is called Breakfast Bites)! It looks like breakfast cereal, tastes like breakfast cereal, but is Low Carb (3g net carbs per serving). You can get it at Louise’s Foods. So now I can’t complain about the lack of low carb cereal at breakfast anymore 🙂
_______________________________________________________________________________
Why can’t I eat a nice bowl of low carb cereal for breakfast instead of these eggs and bacon? I’m always in a rush in the mornings, so breakfast options are low. I’m not even a huge fan of corn flakes or anything, but after a while, some low carb cereal sounds delicious. Some crunchy flakes covered with fresh cold milk. Yum! So what options are there in terms of cereal? A quick internet search yields some disappointing and some interesting options.
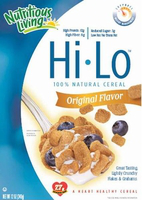 First there’s Hi-Lo cereal. Although it’s marketed as a low carb cereal, it fails in many aspects to convince me that I should even give it a try! First, there’s the ingredient’s list – soy, wheat gluten, corn and rice flour – not a great combination when many low carb diets recommend no grains! Then there’s their net carb count – 7g per 1/2 cup serving, and I’m betting a 1/2 cup serving would not be sufficient for me to starve off the hunger until lunch. Having said all that, it is still lower than other cereals. For example, corn flakes (plain) contains approximately 12g of carbs per 1/2 cup, so it’s definitely an improvement. Some consumers on Amazon seem to really like their Maple Pecan flavor, although others seem to think it’s a bit “bland” and tastes like “cardboard.” Regardless, it’s not on my list!
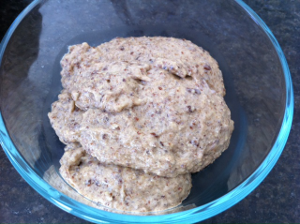 Then there’s a variety of low carb hot cereals, mostly made from flax. Flax seeds are highly nutritious with lots of omega-3 fatty acids and a ton of fiber. If you grind up the flax seeds (in a coffee grinder or a blender with no water), then it forms a flour, which when mixed with water forms an oatmeal-like consistency. Here’s a simple recipe (from about.com) for a hot nutty oatmeal-like cereal that you can make at home.
- Pour half a cup of boiling hot water onto a quarter cup of flax seed meal and mix.
- Add in two tablespoons of almond butter (or peanut butter or some other nut butter) with a quarter teaspoon of cinnamon (optional).
- You can also add in a drop of liquid sucralose or a small amount of stevia to sweeten it.
I made the pictured bowl of low carb cereal by using coconut peanut butter, no cinnamon and 3 drops of liquid sucralose. It tasted ok, not completely like oatmeal though. I think the best description for the consistency is oatmeal with a tablespoon of oil coating it. It’s just a bit gluey!
And lastly (yes, I ran out of low carb cereal options very quickly), there’s a low carb hot pumpkin cereal(from about.com again) that I’m going to try soon. The ingredients sound a bit crazy (but the reviews seem to suggest this tastes really good!).
- Take 1/2 cup ricotta cheese and mix it with some water to thin it out (it can be as thin or as thick as you want, although if you plan to add flax seed meal to it, then add more water).
- Use a whisk to beat an egg into the mixture.
- Then add 1/4 cup of pumpkin puree and a pinch of salt. You can also add in cinnamon/nutmeg and sucralose or Stevia.
- Place the mixture into a non-stick pan and heat on a medium heat. The mixture should go “grainy” after a while as the egg cooks, and you can stir in some flax seed meal then.
I’ll let you know when I make this!
