…But, I’m on Vacation!

DSC_0171_800I love travelling and going on vacation.  However, vacations almost always threaten to unravel months of dieting, careful eating, and general struggle (not to mention a lot of sweat and tears). 

It’s super easy for me to blame the limited food options at the airport and on the planes, as well as the need to experience the full breadth of the local cuisine in other countries. Really, though, vacation not only releases me from the stresses of work, but also severs the already loose strands that tie me to a diet.  And I don’t just go off the diet a bit, I got off it in a completely devastating way. 

My vacations often seem to revolve entirely around eating.  Where I’m eating my next meal at any given time is carefully arranged beforehand, and when I arrive at the predetermined restaurant, my eye immediately scans the menu and generally falls to the most unhealthy dish possible.  Likewise, my hand detaches itself from from my brain and goes directly to the bread basket.  Despite the seemingly unthinking nature of my actions, the true problem is really one of mindset – anytime I make one of these unhealthy food choices while travelling, there’s this small but powerful voice in the back of my head repeatedly chanting: “I’m on Vacation.  None of this matters right now.” 

Is there any hope???

Recently, I’ve decided to attack my vacation diet woes before I vacation, and you’d be astonished what a little forethought has been able to do.  In general, there are 2 Things You Must Do in order to avoid reversing your dietary achievements while vacationing:

Pack Snacks for the Journey

nuts

This is, by far, the single most important thing you can do, but it’s a bit counterintuitive.  After all, the amount of time you’re travelling is typically much shorter than the amount of time that you’re actually on vacation.  Even so, if you start eating badly on your way to your destination, there is almost no chance that you’ll be able to convince yourself to restart your diet while you’re there.  Consequently, you absolutely must pack sufficient healthy snacks and meals for your journey (whether by plane, train, or automobile).

There are a few easy snacks that you can pack for your trip – it’ll save you money on expensive and awful food as well as keep you on a low carb diet.

1.  Nuts and seeds – you can easily make you own pack and sprinkle it with salt or other spices.  You can see a picture (just above) of my pack for the flight (it has almonds, hazelnuts, pine nuts, and walnuts).

2.  Jerky – you can buy (or make) beef or turkey jerky pretty easily.  The beauty of jerky is that it will not spoil, takes up relatively little space to pack, and won’t cause a mess.  In addition, it’s the most filling of the options listed here and is my personal favorite.

3.  Fruits – too much fruit can be the downfall of a diet, but a few apples, pears, or similar fruit will be ok (berries are good but are tougher to pack and messier to eat). 

4.  Deli meat – this won’t keep for long if you don’t have some form of cooler, but it can be great as breakfast if you’re leaving early in the morning or as a snack just a few hours into your journey.  Deli meat packs easily in a Ziploc bag and isn’t messy to eat in a plane, train, or car.

As I noted above, starting your trip off on an unhealthy note will only set the tone for the rest of your vacation and make it almost impossible for you to recover.  That’s why it’s essential that you plan ahead for you journey.  Personally, I often pack more food and snacks than I’m even able to eat on the journey – doing so forces me to eat what I’ve packed (rather than airport food), since I’ll feel slightly bad about throwing away the food I’ve packed if I don’t finish it.

This leads me to my second suggestion:

Eat Smaller Portions on Vacation

You’re in a new country or a new state, and you want to try the local cuisine.  It’s partially why you took such a long and arduous trip!  Or else, you’re visiting relatives or friends, and they insist on taking you out to eat at all the restaurants that offer nothing for your diet. 

The best thing you can do in these situations is to simply eat smaller portions.  I hate calorie-counting diets or diets where I just need to eat less, since I always end up being hungry for the better part of the day.  However, this is the more realistic and easier choice on vacation, since I’m typically moving around so much and seeing and experiencing new things. 

If you’re like me, you really want to try lots of different local foods.  The healthier way to do this is to eat lots of variety rather than simply “eating lots”.  Instead of eating a whole pizza in Chicago, eat just one slice (if you’ve never had real deep dish, take my word that one slice is plenty for most of us).  Travelling abroad to China where you’ll see some delicious-looking dumplings?  Order 4 different kinds and eat 1 or 2 of each.   The point is not to try to avoid the local food just because it may not fit into your normal diet routine.  Doing so is impossible for most of us, since it would make our vacations generally miserable.  Rather, experience as much variety as you can while on vacation, but limit yourself to smaller portion sizes.

If I’m really serious about not reversing gains that I’ve made recently, then I’ll try hard to keep a rough calorie count (it’s often difficult with foreign foods, but just a rough estimate is enough).  I generally try to stick to my personal maintenance amount of calories.  If you don’t know your daily maintenance calories, a very rough estimate is 1800 calories/day for women or 2200 calories/day for men (or use this calculator, which provides a slightly better estimate).

Vacations should be enjoyable and relaxing, and eating is a big part of how I relax and enjoy myself.  However, that doesn’t mean that I need to come back from my vacation more stressed than ever about how I’ve ruined 2 months of dieting in just 1-2 weeks.  With just a little planning and forethought, my recent vacations have become much healthier and no less enjoyable.  As an added benefit, I actually feel better while on vacation!!  If I eat really badly, I often feel sluggish and sleep away large portions of my vacation.  Eating better allows me to have more energy to do activities and generally better enjoy my time while on vacation. 

How about you?  Any tips for how you combat dietary sabotage while on vacation? 

What’s All the Fuss about High-Fructose Corn Syrup?

wheat_thinsSigh…the news these days is always depressing – this causes cancer, that causes obesity, everything shortens your life-span, and so on.  One barely knows what’s safe to eat anymore

In that vein, we’ve been hearing a lot over the past 5 or 10 years about the “dangers” of high-fructose corn syrup, and many soft drinks and foods now specifically advertise that they don’t contain high-fructose corn syrup.  So what is all the fuss about?  What is high-fructose corn syrup (aren’t fructose and corn pretty natural??) and is it worse for you than other sweeteners like table sugar?

A friend recently asked me a number of questions about the differences between high-fructose corn syrup and other sugars, so I decided to do some digging.  I realized that I had relatively few answers to my friend’s questions – my knowledge pretty much extended to the commercial warnings I’d heard that high-fructose corn syrup (which I shall, in very lawyerly-fashion, define as “HFCS”) was “bad” for me.  And so we begin….

What is High-Fructose Corn Syrup (HFCS)?

Basic chemistry:  the most common and well-known form of sugar in American households is undoubtedly table sugar, which is made from sugar cane.  Table sugar is actually composed of two other sugars: 50% glucose and 50% fructose. 

HFCS, like table sugar, is also composed of glucose and fructose.  However, the proportions are slightly different in HFCS.  The typical proportions of HFCS (as you might find in the HFCS used in soft drinks) are 55% fructose and 42% glucose (with 3% other sugar molecules ).  Chemically, then, HFCS is really not that different from the white, powdery table sugar that people have used for centuries.  In fact, it not very different at all from that “all-so-natural-and-healthy” honey (which also has slightly higher concentrations of fructose than glucose).

Where does HFCS come from?

I know it comes as a complete shock to you, but high-fructose corn syrup is manufactured from…um…corn.  Without getting too “science-y,” they start with corn syrup, which is 100% glucose, and add some enzymes to convert some of the glucose into fructose.  This process is slightly more complicated but not really all that different than the process used to process table sugar out of sugar cane.  

Given that HFCS isn’t all that different chemically or process-wise from table sugar…

Why do so many food manufacturers use HFCS?

cocacolaAfter all, it seems odd to go through the hassle of doing extra processing just to create a sugar that’s similar in so many ways to table sugar.  But, as with most things in life, it’s all about the $money$

It surprised me somewhat, but HFCS is generally only used in the US.  For example, most Coca Cola sold outside of the US is made from “real” cane sugar, but HFCS is used in US Coca Cola.  So why is it cheaper to use HFCS in the US? Shouldn’t the more complicated processing actually make HFCS more expensive?

The answer lies with the US government, which has subsidized corn production forever (ok, not quite literally, but for a very long time).  This has resulted in lower HFCS prices than sugar prices.  In addition, the US does not limit production of HFCS unlike in Europe, which generally has quotas for the production of HFCS.  Because of the price differential, HFCS became the popular sweetener of choice in America.  However, its use has steadily declined in recent years due to concerns about its impact on health (although many foods, e.g., Special K and Oreos, still use HFCS).

Is HFCS bad for you?

To keep the suspense level down, I’ll give you the conclusion first.  There are a few studies linking HFCS to obesity (most recently, a Princeton study found rats gained more weight eating HFCS than table sugar even when their overall caloric intake was the same) and higher risks of heart disease, but these studies are nowhere close to conclusive (in fact, I’d be highly skeptical of the conclusions drawn in the heart disease study!).  In general, whether it’s HFCS or any other type of sugar that they’re putting in, it’s going to add a lot of calories to your diet, and they’re calories that add zero nutritional value to your diet! 

Although the studies are pretty inconclusive at this point, it is possible that HFCS is marginally worse for you than table sugar.  Many scientists postulate that this difference is due to the higher fructose concentrations in HFCS.  Fructose has recently been highlighted by several scientists and health writers as being the worst of the sugars, and this may be a good reason to abandon HFCS, although don’t forget that cane sugar is really not that much better!  And if we’re throwing dirt on fructose and anything containing high levels of fructose, then we should also be worried about honey (which contains more fructose than glucose) and agave (which is mostly fructose, almost 90%).  So, while the media and public opinion paints devil horns on any products containing HFCS, maybe you should be considering what you’re sweetening your foods and drinks with…it may be even worse for you than HFCS.

MM900288867

P.S.  In a last ditch attempt to save HFCS, the corn industry is planning to rename it to “corn sugar” to curb “consumer confusion.”  Do you think this new name will make you feel safer about consuming the product?  Feel free to comment below.

Caffeine Addiction or Chemical Overload – Could Decaf be More Chemically Dangerous than Caffeine?

coffee cupMmmmmm….Decaf.  Same great taste, same great chemicals?  For a long time, I’ve drank decaf beverages without really giving a second thought to how my drink came to be “decaffeinated.”  They grow decaf tea leaves and coffee beans, right?  Right?

Not quite.  Benzene, methylene chloride (dichloromethane), trichloroethylene, and ethyl acetate are all chemicals that have been or are used in the decaffeination process of tea, coffee, and kola nuts (those things that make coca cola taste so amazing!).  Somehow, knowing their names makes that previously delicious cup of decaf suddenly sound a little more like a brew of hazardous toxins.

I’m an avid drinker of tea, and although my favorite saying is “While there is tea, there is hope,” I am also an avid believer of “8 hours of sleep a night will keep the crankiness out of sight!”  So despite the many sneers of “What’s the point of decaf?” I keep my cupboards well stocked with decaffeinated tea and occasionally even decaf coffee and diet coke!  I was therefore quiet a bit alarmed when I heard that the process of decaffeination introduced a slew of unwelcome chemicals into my teapot. 

So, is Decaf Safe to Drink?

I’m going to lead you through all the different methods of decaffeination – sometimes it gets a bit technical as there’s a slew of information out there.  This is more like the definitive guide to decaffeination rather than a simple regurgitation of the Wikipedia entry, but I’ve highlighted the main issues in each paragraph so that you can just skim through if you’re not all that particular about your decaf beverage.  Let’s start with the different ways that beverages have been or are decaffeinated.

  1. Benzene:  Decaffeination has been around for a long time.  Ludwig Roselius and Karl Wimmer discovered a method involving benzene back in 1903, which marked the first commercially successful benzenedecaffeination process.  There was a problem with benzene, however.  Although benzene is a highly useful chemical commonly found in crude oil, it has been directly linked to cancer as well as other illnesses such as leukemia and other bone marrow problems. Scared?  Yeah, you should be!  Thankfully, benzene is no longer used to remove caffeine.  Also banned is trichloroethylene, another organic solvent that had been used in decaffeination.
  2. Methylene chloride:  We’ve now jumped to the present and a commonly used solvent known as methylene chloride or dichloromethane, which is colorless and possesses a sweet aroma.  During the decaffeination process, the coffee beans or tea leaves are first steamed to draw the caffeine in them to the surface.  Methylene chloride is then used to wash the caffeine from the beans or leaves.  This process works because caffeine, but not the coffee or tea flavor, dissolves into the chemical.  Although most of the chemical is removed by evaporating it off, minute traces of methylene chloride is left on the coffee or tea (I’ve seen unconfirmed sources of 1 part in a million thrown about recently.  Both the US and the UK only permit a maximum of 5 parts per million).  Should we be worried about 1 part in a million?  Methylene chloride is common in many households products, ranging from paint stripper to pesticides.  As a result, we are often exposed to it (11 parts per billion parts of air in some urban areas and waste sites according to the US Dept of Health and Human Services’ 2000 toxicology profile for methylene chloride).

    So is it safe?  Yes, unless you somehow drink 10,000 cups of coffee per day.  High concentrations of methylene chloride can cause nausea, numbness of extremities, and even unconsciousness and death, but when I say “high concentrations,” I mean seriously high concentrations!  The toxicology profile indicates that levels over 10,000 parts per million in one sitting – that’s around 10,000 cups of coffee or tea in one day – have caused death and illnesses in some animals.  A study in the Journal of the American Medical Association found:  “Studies of rats fed regular and decaffeinated coffee (at doses equivalent to 70 or 80 cups of coffee a day) or fed methylene chlorine in their drinking water (at doses equivalent to 125,000 to 6,250,000 cups of decaffeinated coffee a day) showed no evidence of carcinogenicity.”  Convinced yet?  I think like many consumers, the mere mention of chemicals even if just trace amounts may make your heart start racing.  That’s probably why the imported decaf tea I drink, Typhoo (a British typhoobrand), doesn’t mention methylene chloride anywhere on the packaging or on their website – instead, they call it “gently” taking out the caffeine (see photo) and “a technique to wash the tea” (see their website).  (Incidentally, Tetley and PG Tips both also use this same process of decaffeination).  If you’re not British, then you’re probably more worried about coffee.  Many brands of decaf coffee will be made using the methylene chloride method, and there’s no way to know except to check each brand (if you’re that paranoid despite what I’ve just told you about it being completely safe!).  In case you are paranoid, Starbuck’s website lists Decaf Sumatra as being made using the carbon dioxide process discussed below, which doesn’t use any “chemicals” unless you’re also paranoid about CO2.  I haven’t seen any definitive answer regarding other brands of Starbucks decaf although this website claims that as of 2009 all of Starbuck’s decafs were processed using methylene chloride.

  3. Ethyl Acetate or “Natural” Decaffeination:  The word “natural” probably piqued your interest, although placed alongside “ethyl acetate,” it probably confused you a bit.  Well, it’s “natural” because ethyl acetate occurs naturally in fruits. The process itself is similar to that explained above for methyl chloride (i.e., ethyl acetate is just used to wash the caffeine away).  I haven’t found any coffee or tea brands that admit to using this process, but that may be because ethyl acetate not only takes out most of the antioxidants along with the caffeine but also imparts a chemical taste to the coffee/tea.

Are there any non-chemical methods of decaffeination?  If you’re paranoid, then you’ll be happy to know that there are several non-chemical processes that a lot of companies are using these days. 

  1. Carbon dioxide process:  Pre-steamed tea leaves or coffee beans are soaked for 10 hours in a semi-liquid form of CO2 in a pressurized chamber.  (CAUTION: this gets scientific here…)  The CO2 binds to the caffeine molecules but leaves the flavor molecules mostly intact (although 8% of antioxidants may be removed).  Then after the soaking is complete, the pressure is reduced and the CO2 evaporates and is removed along with the caffeine.  You’re probably jumping for joy right now – why don’t we use CO2 to decaffeinate all teas and coffees?  Well, how much do you want to pay for your precious cup of tea or coffee?  Unfortunately, the high pressure required to keep the CO2 in a semi-liquid form for 10 hours does not come with a low price tag.  But if you’re willing to pay for peace of mind, then go ahead.  Most manufacturers that use the process happily advertise the fact.  For example, I also sometimes drink Allegro’s decaf black tea and that’s decaffeinated using this process (see photo). 

    allegrotea2

  2. Swiss Water Process of Decaffeination: You can decaffeinate with water??  Again, why doesn’t everyone just use this process?? Well, like the CO2 method, it’s also not that common and fairly expensive.  Exposure of coffee beans to water multiple times may cause diminished flavor. This process is generally also only used for coffee decaffeination and not for tea. The process is not as simple as you might think and involves several stages of caffeine removal.  I’ll try not to bore you with the science, but the basic process is placing the coffee beans in a caffeine-free coffee extract water.  This then allows the caffeine to diffuse from the coffee beans into the caffeine-free liquid while keeping the coffee flavors in the beans because there’s already so much coffee flavors in the water.  This is repeated over and over again to remove most of the caffeine. If you want a more in-depth yet understandable explanation, try this website.

Can’t I just brew the caffeine out of tea at home?  I’ve read numerous sites claiming that you can decaffeinate tea yourself by throwing away the first brew of the tea.  Of course, this isn’t really possible with many weak tea brands (I need to use 2 Lipton tea bags just to brew one small cup of barely drinkable tea!).  While many websites suggest that it takes a mere few seconds for the caffeine to seep out of the tea, there is a very authoritative article citing studies suggesting that it will take 15 minutes of brewing before close to 100% of the caffeine is removed (30 seconds will remove only 10-20% of the caffeine).  So while you can make your own cuppa decaf tea, you will also end up drinking some serious weak crap – you might as well drink hot water!  It’s also possible (to a limited degree) to make a decaf your own coffee at home using the Swiss water process, but it’s rather complicated (see this website if you’re interested).

Hey, what happened to decaf soft drinks?  Oh yeah, I nearly forgot about that!  Did you forget what a can of coke contains?  Chemicals… and you’re asking whether the chemicals in the decaffeination process is going to kill you?  Well, many soft drinks actually add in caffeine extracted from the decaffeination process so I suspect that the decaf variety of those soft drinks just omit those additions.

I got lost – what’s the conclusion?  Yeah, it’s taken me a few days to go through the mountainous amounts of information out there.  There’s a lot of negative press about decaf drinks stemming mainly from the previous use of hazardous chemicals such as benzene.  However, all the decaffeination processes today are very safe.  But we all have our own individual views about what constitutes safe and the beverages industry has reacted to consumer demands for non-chemical methods of decaffeination.

Bottom line – all decaf drinks are safe, but if you jump at the word “chemical” then buy coffee or tea that has been decaffeinated using the CO2 or the Swiss water process.

decaf

Is Sea Salt Healthier than Table Salt?

pink saltI’d like to consider myself a savvy consumer, at least when it comes to food. So it’s a bit annoying when I realize that I’m buying something just because the packaging is pretty or I saw a flashy advertisement selling it to me.  However, I’ve got to occasionally give credit where credit is due…

There is a certain amount of advertising genius behind the "natural sea salt movement."   I don’t watch too much Mad Men, but the advertising story surrounding salt seems so made-for-TV that I can almost envision a Madmen episode on this (feel free to contact me Hollywood)!

I’m pretty sure that the advertising discussion for salt must have gone something like this:

“OK Joe, how should we advertise this salt?”

“Well, we’ll claim that it’s the most exciting new culinary invention in decades!!”

“But Joe, it’s been around for millennia…”

“Um, how about we claim that salt is so scarce that only a few lucky individuals will have the opportunity to enjoy it?”

“But JOE!  EVERYONE can buy it already!”

“I’ve got it – We’ll create new kinds of salt.  We’ll even make some of them PINK!”

And lo and behold, the salt guys had their “Aha” moment.  Think about this for a minute – when you go to a normal grocery store, there are approximately 322 different types of salt on the shelves.  Really – go count them. 

The salt industry went and CREATED what are essentially new, better, and more desirable saltsWho would otherwise pay 10 times the normal price of salt just because the salt granules were PINK??  I’m sure, all the way back in 1971 when Starbucks was born, it was also crazy to think that anyone would pay $3 for a cup of coffee, but Starbucks seems to be doing just fine.

Now, the bigger question is:  Should we be paying more for certain types of salt?

Salt, the Other Kind of Salt, and the Other Kind of Salt 

There are 3 main types of salt that you’ll find at the store:  table salt, sea salt, and kosher salt.  (There’s also unrefined salt, which is generally sea salt that hasn’t gone through a refining process – I’ll get to unrefined salts later, but note that it’s only unrefined if it’s specifically labeled as such.)   Most table salt is that cheap fine white powder (think Morton).  Then there’s those pink rocks and the exotic salts – they’re usually all different types of sea salt, and when I say different types, I actually mean similar chemical compounds placed in pretty jars with labels that make you think each one of them is “special.”  And kosher salt is, well, kosher salt – it’s also labeled very clearly as kosher salt!

              salt1

α, β, ϒ  Let’s Analyze Salt:  Is sea salt or kosher salt better chemically than table salt?  Well, salt is simply the chemical compound, NaCl (sodium chloride).  No matter what type of salt you buy, table salt, sea salt, and kosher salt each have at least 97% NaCl (it’s part of the Codex Alimentarius Standard).  So whether you’re spending $1 on that huge bag of table salt or $10 on that tiny jar of cute pink crystals, you’ll be consuming 97% the same thing.

What’s the other 3%?  You’re thinking that maybe the other 3% makes up for that 10-fold difference in price?  That’s certainly what the salt industry seems to want us to believe.  In truth, however, that other 3% is not so important or crucial as we might hope: 

In table salt, that other 3% is usually just more NaCl, along with a tiny bit of anti-caking ingredients

tracesaltIn sea salt, that other 3% is often other trace minerals such as magnesium, potassium, sulfates, and bromides.  You’ve probably heard that you need those minerals and that’s why sea salt is so much better for you, but let’s step back just a bit…  They are called “TRACE” minerals for good reason – there’s only TRACE amounts of them in the salt! 

Kosher salt, as I’ll explain below, can be either table salt (derived from underground deposits) or sea salt, meaning that the other 3% in Kosher salt matches either table salt or sea salt, as applicable.

At this point, I need to take a quick detour to talk about unrefined salts, which can be a subcategory of table salt, sea salt, or kosher salt.  Unrefined salts are actually a fair amount different from the usual refined salts that you find in most supermarkets.  Unrefined salts often contain much less NaCl and much more trace minerals.  For instance, a typical unrefined salt might be 70% NaCl and 30% other minerals.  That’s good right?  Yes, but before you run off to the store to get your unrefined salt in order to bulk up on your lost minerals, keep in mind that you’re still going to need to eat A LOT of unrefined salt to actually have it make any difference.  You’d probably be better off spending the money on some multi-vitamins.  Otherwise, you’ll just be overloading on sodium and remain deficient in everything else!

Surely there must some differences in the manufacturing processes of different salts, right? 

saltmineAlthough the labels make the salt sound so exotic (Hawaiian black lava sea salt is definitely a winner in my mind), salt really comes from just two general places – salt mines (deposits of salt underground) or evaporated seawater. The country that the salt comes from really doesn’t matter – it’s the difference between drinking sea water in Florida versus in Sicily: it’s all just seawater.  Table salt is mined from salt deposits underground.  Sea salt comes from the sea (shocking!) – it’s evaporated seawater.

Kosher salt can come from either underground deposits or seawater – what’s “special” about the salt is that it contains no additives (e.g., no iodine), and it has been certified as kosher by a rabbi or other authorized organization. Kosher salt originates from preparing foods such as meats according to Jewish law, which prohibits the consumption of any blood in the meat.  The large granules of kosher salt is therefore perfect for drawing out traces of blood from the meat. If fine granules of table salt was used, it’d quickly dissolve once placed on the meat resulting in very salty meat.  Kosher salt is often advertised as “better” because it’s pure with no additives.  However, the main additive that they’re talking about is iodine.  Remember those seriously disgusting lumps protruding from the necks of people with goiter?  Yeah, that’s called IODINE DEFICIENCY!  Iodine was especially added into salt to help with this problem, much like fluoride is added into tap water to prevent tooth decay.

So I’m confused now, is there ANY real difference? 

Surprisingly, yes – but just not for the reasons that advertisers (those genius madmen) wanted you to believe.  There is a distinct difference in the texture and, to some degree, the taste.  Table salt is much finer than sea salt or kosher salt, which means that there is a lot more salt in one tablespoon of table salt than of sea salt or kosher salt.  So when substituting one type of salt for another when following a recipe, you should remember that 1 tablespoon of kosher salt/sea salt = 3/4 tablespoon of table salt (although this equation can vary a bit as the granule sizes often vary from brand to brand).  Table salt is also better for baking as its fine granules mix more easily into the dough.  As to taste, some people say that table salt has a sharper taste than kosher or sea salt.  I personally tend not to eat salt all by itself, and once blended into the food, it really just tastes salty to me.

So what should you do when you see one of those carefully manicured jars of softly colored rocks of salt screaming “BUY ME, BUY ME – I’m Natural, I’m Healthy, I’m way Better Than The Rest” as you walk down the supermarket aisle?   Take it with a grain of salt – it’s all salt!  (Don’t cringe and shake your head now – you had to know that I’d squeeze that joke in!)

           typesofsalt

Empty Fridge, Empty Stomach

Cartoon Empty Fridge

Empty Fridge, Empty Stomach

When I first started trying to be healthy and low-carb, I was always hungry when I got home at night, and the question on my mind was always: “What should I eat for dinner?” It was a hard question to answer especially when my fridge was empty and my list of “should eat” foods didn’t correspond too well with the “want to eat” foods (i.e. I wanted to eat cake – who doesn’t??). These were pretty serious problems, especially when you’re a ravenous monster exhausted from an entire day of work! Keeping on any diet (whether low carb or otherwise) is practically impossible when you’re faced with hunger pangs, an empty fridge (or a fridge full of foods not on your diet), and a fixation on cake (I’m also up for brownies, cupcakes, ice-creams, if they’re good). It’s like asking for your diet to be broken! Well, it’s taken me months and cake still tempts me, but I’ve come to realize that there are three important practices that have made healthy eating a lot easier to stick with (at least when you’re at home!):

1. Throw Out the Bad Food It’s practically impossible to eat unhealthily in my apartment – there’s no sugar, no flour, no pasta, no potatoes, no rice or other grains, no fruit juice, and definitely no cake (I’ve searched!). There is therefore no temptation in front of me at home. Of course, my mind still tempts me, but luckily I’m generally way too lazy to make the effort to go out and buy bad food (although the 7 Eleven on my street corner does do some midnight business from me unfortunately)! But if you’re going to cheat and buy a pack of cookies, be sure to throw out the leftovers (if any) so that you’re not tempted to continue to eat them the next day!

2. Stock Up on Good Food If you just have an empty fridge, then no amount of willpower will stop a hungry and tired you from going out to buy a bunch of “bad” foods. Go to the store when you’re NOT hungry and stock up on “healthy” provisions. What can you buy? There are the staple items: coconut milk, protein powder, eggs, a variety of vegetables (no potatoes or carrots) and fruits. You can also stock up on nuts, dark chocolates and cheese as snacks to take to work. You’re probably thinking that my shopping list doesn’t sound like too great of a meal, but wait, there’s a third step still!

cooking clipart3. Cook Lots on the Weekends and Watch TV I hear the groans coming now: “I can’t cook,” “my food tastes like ****,” “cooking is [insert your complaint here, e.g., boring, tiring, annoying].” Yeah, I know – I made those same old excuses myself! I’ve had plenty of cooking disasters – I still do (I burnt some vegetables two days ago) – and I’ve cooked plenty of dishes that I couldn’t bring myself to eat (you only see the recipes that worked!). But, it’s honestly not that awful. There are many trustworthy recipe websites where you can read reviews of how the food turned out. Many recipe sites like allrecipes.com have user ratings for all the recipes and some recipes even provide a carb and calorie count. Pick easy recipes that get good reviews – there are quite a lot of them. And then it’s just a bit of trial and error. Make large portions over the weekend and store in the fridge to eat over the week. I’ve found cooking to be quite relaxing actually – it allows me to be a bit creative on occasions and most importantly gives me an excuse to watch tv without feeling like I’m wasting my free time! I’m in a job where I sit for most of my waking hours so getting to be standing in the kitchen is a calorie-burner in itself! And lastly, cooking your own food is way cheaper and cleaner than eating out or buying prepared foods. Have I convinced you yet?

EXAMPLE: Food For a Week In case you’re still not a believer (and I sense a lot of disbelief here), here’s an example of what I would cook for an entire week for 2 people over the course of 3-4 hours on Sunday (while watching some tv crime drama on Netflix). Boiled Eggs

  1. Boil a dozen eggs, peel, let cool naturally and store in a container in the fridge. There are various ways you can eat boiled eggs e.g. chop up and put in a green salad, chop up and mix with some mayo and mustard and salt to make an egg salad, chop up and mix with soy sauce, sesame oil and a touch of hot sauce, or just eat it by itself (body-builders do it all the time!).
  2. Buy some washed spinach, grape tomatoes, canned tuna and canned or jarred olives. These are simple to store and you can make a salad in less than 5 minutes with these. As a dressing, try ranch or Caesar or simply olive oil, vinegar, and salt.
  3. Make some bunless burgers. I’m not a big fan of the beef taste, so I like to put some yellow onions, green onions, sometimes a leek, some garlic, ginger, a bit of garlic and onion powder, and some salt (or basically whatever you want – blue cheese also works well!). You can get grass-fed ground beef at Wholefoods, and it’s easy to just mix the spices and vegetables into the beef. You don’t have to cook it on a BBQ grill – I use a Foreman grill sometimes, other times I pan-sear it in some coconut oil or butter for a more grilled flavor, or I’ve even put the burgers into the oven and baked it (you can also put it under the broiler for a few minutes to kind of sear the outside after cooking it in the oven).
  4. Make a roast, or pulled pork or chicken in the slow cooker. Slow cooker cooking is the easiest form of cooking! All you have to do is put the meat into the slow cooker, add a bit of water or broth (and spices if you’re feeling up to it) and leave to cook for 8 or more hours on a low heat. The meat comes out tender, and then all you have to do is add some soy sauce, hot sauce, or zero calorie BBQ sauce and it’s a meal. You can cook a lot of meat in one go in the slow cooker, so it can easily last for several meals.
My dinner on Thursday Night: pulled chicken thighs cooked in the slow cooker with Crystal hot sauce and Walden Farm Honey BBQ Sauce, Japanese radishes boiled in soy sauce, and stir-fried Napa (chinese) cabbage

My dinner on Thursday Night: pulled chicken thighs cooked in the slow cooker with Crystal hot sauce and Walden Farm Honey BBQ Sauce, Japanese radishes boiled in soy sauce, and stir-fried Napa (chinese) cabbage

The options are really endless. There are so many recipes (e.g. eggplant lasagna, coconut pancakes, and flax muffins) that you could easily cook a large batch of in a few hours and eat for the week. I like to cook several different dishes so that I can have variety during the week, but how many you cook is up to you.

Pulled Pork with Zero Carb BBQ Sauce

A Green Egg and the Delicious Pulled Pork that Came Out

A Green Egg and the Delicious Pulled Pork that Came Out

I had pulled pork cooked in an green egg a few weeks ago at a friend’s house in Georgia. A green egg? It’s a high end ceramic charcoal cooker that keeps temperatures regulated throughout the cooking process and it’s shaped like a green egg (see photo). It tasted delicious, but unfortunately, the green egg costs over $1,000, requires a deck or balcony (which is impossible in NY), and takes 8 hours of monitoring. Instead of all that, I just use my handy slow-cooker. And what about the BBQ sauce? Aha – this is where it gets exciting…Zero-calorie delicious BBQ sauce – keep reading and all will be revealed.

Raw 3lb Pork Butt in Slow Cooker with Zero Calorie BBQ Sauce and Seasoning
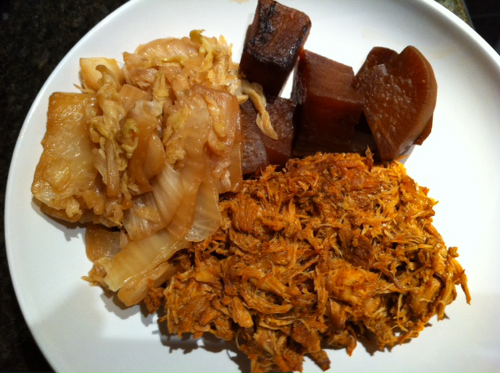
Instructions for Cooking the Pulled Pork:

  1. Get some pork butt or pork shoulder and place it into the slow cooker. (The photo shows 3lb of pork butt.)
  2. Pour some sea salt into the pot (2 tablespoon for 3lb).
  3. Add 1 cup water.
  4. Optional: add some garlic and onion powder and some of the zero-calorie zero-carb BBQ sauce (see below).
  5. Cook on low (300F) for 10-12 hours (it’s ready after around 8 hours, but I like it super tender).
  6. Shred using two forks.

Zero-carlorie, Zero-carb BBQ Sauce:

Walden Farms Calorie Free Carb Free Honey and Thick and Spicy BBQ SaucesThere are 2 incredible parts to this secret sauce:

FIRST, Walden Farms makes these amazing zero-calorie zero-carb dressings and sauces (and even a chocolate dip). You can buy it off Amazon for $3.99 plus shipping or at random little stores like the one on the corner of 9th Ave. and 36th St. without the shipping. There are 4 flavors, and I’ve tried 2 so far: Honey and Thick N’ Spicy. Ok, if you’re reading their reviews on Amazon or you’ve tried it, it’s not exactly amazing. The Thick ‘N Spicy is pretty good if you can handle a lot of spice. The Honey isn’t spicy, but you can taste the fake sugar in it. But, if you add the second part of this secret sauce, it transforms….

Crystal Hot Sauce Louisiana's Pure Hot Sauce - 12 ozSECOND, Crystal Hot Sauce, which you can buy from Amazon for $7.99 and free shipping. It may not sound that amazing, especially since the ingredients are so simple: Aged Red Cayenne Peppers, Distilled Vinegar, Salt. But, it is just that…amazing. It adds so much flavor without being too spicy. I love spicy food, but I can’t take huge amounts of spice, so this is perfect.

The trick is to combine the Crystal sauce with the Walden Farm Honey BBQ and then adding a touch of salt. The hot sauce flavor completely covers up the fake sugar taste in the BBQ sauce so that you’re simply left with a delicious sauce! Pour onto your pulled pork, or pulled chicken or whatever meat you want. Zero calories. Zero Carbs. I could write something very cheesy right now, but I’ll stop here.

Low Carb Ice Cream Part 1 – FAIL

Low carb desserts are definitely the weak link in the locarbolicious diet! And, unfortunately, my search for an edible low carb ice-cream has so far lead me nowhere. In fact, it’s really a disgrace to call the frozen foods that I’m going to describe below “ice-creams” because they bear so little resemblance in taste to them! If you don’t believe me, you’re welcome to go try them, but just remember that you’ve been warned! There’ll be a part 2 to this as I’ve got a few more ideas to try before giving up!

Arctic Zero Fake Ice-cream - Mint Chocolate and Vanilla Maple FlavorsArctic Zero: You know, they do such an amazing job of advertising their 150 calories per pint fake ice-cream, that I’ve actually been fooled twice into buying it! I somehow forgot just how awful it tasted after my first purchase (the mint chocolate cookie), and so when I saw it again in Wholefoods, I was fooled AGAIN (I bought the vanilla maple flavor that second time)! So, what is this Arctic Zero that’s able to fool me twice? It’s not ice-cream in any way (even though they call it an “ice-cream replacement”) – it has no milk or cream in the ingredients list. At best, it might be described as a bad sorbet perhaps. It’s true that their ingredients list looks pretty “natural,” but “natural” does not equal good tasting! On the contrary, their main ingredient is purified water (which, if you forgot, tastes like nothing). Their second most populous ingredient is whey protein concentrate, which also does not taste good (that’s why you have to flavor protein shakes so much!). Then comes a whole slew of sugars and flavorings, including organic cane sugar, chicory root, guar gum, xantham gum, natural flavors, sea salt, monk fruit concentrate. These are definitely not ingredients for the low carb purists! Ok, enough about the ingredients, the truth is I just care about whether it tastes good!

How does it taste? Because most of the pint is just frozen water, it doesn’t have the creaminess of ice-cream. Instead, it’s closer to ice, which presents a slight challenge when you’re trying to scoop it out. You could of course wait for it to melt a bit, but then it turns into a slushy frozen fudge-like consistency, which tastes even worse. I prefer the taste when this so called “ice-cream” is frozen because I can at least pretend that it’s just flavored ice or something! The mint flavor smells ok – mint + chocolate. The taste though, was just a watery mess. It was kind of minty and kind of maybe chocolatety and vaguely sweet. The vanilla maple was even worse – maybe vanilla and maple just doesn’t work well together, I don’t know, but all I can say was yuck!

Frozen Bananas Blended to Make Fake IcecreamBananas: You might have heard of this trick already, but after you put frozen bananas through the blender, they come out looking very much like creamy ice-cream. You can easily try this yourself by getting 2 bananas (you need enough bananas in the blender for it to have something to blend otherwise it doesn’t work) and chopping them up into half-inch chunks (as shown in the top picture). Place the chunks of bananas into the freezer overnight (it doesn’t work if the bananas are not well-frozen as I found out on my first attempt, which resulted in a disgusting gooey mess). Then place the frozen banana chunks into the blender and blend well for a few minutes – at first it looks like it’s just chopping the frozen bananas into smaller frozen chunks, but after a while, you’ll see the “ice-cream” form (see photo).

How does it taste? Like bananas (surprised?). It’s kind of creamy, but it’s not really creamy like full fat dairy ice-cream and it has a gooey texture when it melts in your mouth (not surprising since that’s the texture of banana puree). So maybe if you really like banana-flavored, not-so-creamy ice-cream, then this might work! Oh, and it’s not really low-carb since bananas have a lot of carbs. One medium sized banana (7″ to 7-7/8″ long) has 27g carbs (3g fibre and 14g sugar!). So, not a great choice!

Ok, don’t despair just yet as there are a few other options for low carb ice-creams out there. I’m going to try and get my hands on a tub of the Carbsmart Breyers Ice-cream (their website claims that Food Emporium carries one of the Carbsmart ice-creams). And then there’s also the trial and errors of home-made ice-cream. Part 2 coming soon… If you’ve tried a low carb ice-cream, please comment below to let me know what you thought of it.

Low Carb Breakfast – Coconut Pancakes

Low Carb Coconut Pancakes

Low Carb Coconut Pancakes

I’m actually more of a fan of the French crepes (which I once heard an American call “creeps”) rather than the thick pancakes that you’re used to finding at brunch and in diners, but they start to taste super good when you can’t eat cake or any other desserts! I’m sure the low carb diet would never have taken off if the wonders of coconuts hadn’t been discovered. We drink the milk, make cookies from the flesh, and now make pancakes from the flour! And these pancakes sure seem popular with low-carbers! I found an abundance of different recipes, but I thought this recipe from nourishingdays.com was pretty easy and tasted super good! I made a batch of 10 pancakes and stored them in the fridge – delicious for breakfast!

Ingredients (makes 10 small pancakes):

  • 4 eggs
  • 1/2 cup coconut flour
  • 1 cup coconut milk (from the cans, not the cartons – make sure it doesn’t have added sugar and it isn’t the “light” stuff. Also shake the can before opening as the cream and the water separates.)
  • 2 teaspoons vanilla extract (make sure you buy a brand that has no added sugar)
  • 3 drops of liquid sucralose or 1/2 teaspoon of Stevia
  • 1 teaspoon baking soda
  • 1/2 teaspoon (sea)salt
  • coconut oil or butter for cooking
  1. Beat the eggs; add in the coconut flour, coconut milk, vanilla, baking soda, salt, and sucralose/stevia. Mix well.
  2. To cook these pancakes, you can use a griddle, or if you don’t have one like me, you can just use a frying pan. Put some coconut oil or butter to grease the pan and put the pan on a low heat.
  3. Ladle some of the batter into the pan (to form a 3 inch diameter circle). The pancake should be thick so don’t try to make the batter spread out. If you’re using a large enough frying pan, you can cook 3 or 4 pancakes at the same time.
  4. Cook for 2 minutes and then flip. Continue cooking and flipping until both sides are brown.
  5. The pancakes are a bit dry by themselves, so have it with some butter or coconut oil or else some fruit.
Low Carb Coconut Pancake Batter in Mixing Bowl and in Frying Pan

Low Carb Coconut Pancakes Batter in Mixing Bowl and in Frying Pan

Nutritional Information

For one pancake: Calories = 151 Fat = 11g Carbohydrate = 9g (5g fiber, 0.4g sugar) Protein = 4g

Low Carb Cereal

Update:  I got tired of the No Low Carb Cereal situation I originally wrote this post about and created my own Low Carb, No Grains/Gluten, No-Added Sugar Breakfast Cereal (it’s 100% all-natural and is called Breakfast Bites)!  It looks like breakfast cereal, tastes like breakfast cereal, but is Low Carb (3g net carbs per serving).  You can get it at Louise’s Foods.  So now I can’t complain about the lack of low carb cereal at breakfast anymore 🙂

_______________________________________________________________________________

Why can’t I eat a nice bowl of low carb cereal for breakfast instead of these eggs and bacon? I’m always in a rush in the mornings, so breakfast options are low. I’m not even a huge fan of corn flakes or anything, but after a while, some low carb cereal sounds delicious. Some crunchy flakes covered with fresh cold milk. Yum! So what options are there in terms of cereal? A quick internet search yields some disappointing and some interesting options.

Hi Lo cereal - Original FlavorFirst there’s Hi-Lo cereal. Although it’s marketed as a low carb cereal, it fails in many aspects to convince me that I should even give it a try! First, there’s the ingredient’s list – soy, wheat gluten, corn and rice flour – not a great combination when many low carb diets recommend no grains! Then there’s their net carb count – 7g per 1/2 cup serving, and I’m betting a 1/2 cup serving would not be sufficient for me to starve off the hunger until lunch. Having said all that, it is still lower than other cereals. For example, corn flakes (plain) contains approximately 12g of carbs per 1/2 cup, so it’s definitely an improvement. Some consumers on Amazon seem to really like their Maple Pecan flavor, although others seem to think it’s a bit “bland” and tastes like “cardboard.” Regardless, it’s not on my list!

Nutty Flax Oatmeal-like Hot CerealThen there’s a variety of low carb hot cereals, mostly made from flax. Flax seeds are highly nutritious with lots of omega-3 fatty acids and a ton of fiber. If you grind up the flax seeds (in a coffee grinder or a blender with no water), then it forms a flour, which when mixed with water forms an oatmeal-like consistency. Here’s a simple recipe (from about.com) for a hot nutty oatmeal-like cereal that you can make at home.

  1. Pour half a cup of boiling hot water onto a quarter cup of flax seed meal and mix.
  2. Add in two tablespoons of almond butter (or peanut butter or some other nut butter) with a quarter teaspoon of cinnamon (optional).
  3. You can also add in a drop of liquid sucralose or a small amount of stevia to sweeten it.

I made the pictured bowl of low carb cereal by using coconut peanut butter, no cinnamon and 3 drops of liquid sucralose. It tasted ok, not completely like oatmeal though. I think the best description for the consistency is oatmeal with a tablespoon of oil coating it. It’s just a bit gluey!

And lastly (yes, I ran out of low carb cereal options very quickly), there’s a low carb hot pumpkin cereal(from about.com again) that I’m going to try soon. The ingredients sound a bit crazy (but the reviews seem to suggest this tastes really good!).

  1. Take 1/2 cup ricotta cheese and mix it with some water to thin it out (it can be as thin or as thick as you want, although if you plan to add flax seed meal to it, then add more water).
  2. Use a whisk to beat an egg into the mixture.
  3. Then add 1/4 cup of pumpkin puree and a pinch of salt. You can also add in cinnamon/nutmeg and sucralose or Stevia.
  4. Place the mixture into a non-stick pan and heat on a medium heat. The mixture should go “grainy” after a while as the egg cooks, and you can stir in some flax seed meal then.

I’ll let you know when I make this!

Dried Fruit and Vegetable Snacks – Dehydrator Frenzy

Dried in the dehydrator: (from top clockwise) kiwi, Bartlett pear, zucchini (courgette), eggplant (aubergine)

Dried in the dehydrator: (from top clockwise) kiwi, Bartlett pear, zucchini (courgette), eggplant (aubergine)

Dehydrator?? I recently bought a dehydrator, which just dries out various foods like fruits, vegetables, and even meats (think beef jerky). It’s a simple device – it basically blows hot air at your foods until they become dry. It’s reasonably cheap for a food device -mine cost $60 on Amazon. I got the Nesco FD-75PR 700-Watt Food Dehydrator, which comes with 5 trays to place food on and has a variety of temperatures for drying different foods. See the pictures below.

3 Pictures of the Nesco FD-75PR 700-Watt Food Dehydrator

3 Pictures of the Nesco FD-75PR 700-Watt Food Dehydrator

How to Dehydrate Foods? It’s so easy to dehydrate foods. For the veggies, I like to slice them into thin slices (around 1 millimeter thick) so that it doesn’t take too long for them to dry. I also like to salt them, which makes them taste better and helps to dry them faster (you can also try adding spices to them) – so boil some water and add a bunch of salt and dump the sliced veggies into the water for 1 minute. Fish them out quickly before they get too soggy. Then place the slices on the dehydrator. I dehydrated the zucchini and eggplant slices for around 9 hours – it’s a bit of a trial and error game because it was difficult to get the slices the same thickness, and the drying time really depends on how thick the slices are. For pears and kiwis, I cut them into thin, 1-2 millimeter slices. They took a little longer to dehydrate though (probably because they were thicker and didn’t have any salt on them). I put them in for 11 hours, and they came out pretty crispy but still a tad chewy and leathery (so it’s not going to break at the touch).

Why dehydrate fruits and vegetables when they taste perfectly good fresh? There are a variety of reasons for this! First, it allows the foods to stay fresh for much longer, so you can buy of box of apples (which is often cheaper than buying them a few a time – think Costco!) and eat those apples several months later. Then, there’s the variety – the dried fruits and veggies are a great snack that you can take with you anywhere in a small ziploc bag. Also, dehydrated fruits and veggies are “not cooked” so they count as raw food if you’re on the raw food diet. It’s super healthy and tasty. I’ve noticed these kale chips in Wholefoods recently. They cost a fortune (they’re not trying to rip you off – it really just cost a lot to produce them!), but you can make your own by buying some kale, salting it, and dehydrating it!

I started making some dried watermelon slices…

Watermelon sliced thin in the dehydrator (before dehydrating)

Watermelon sliced thin in the dehydrator (before dehydrating).