Creative Cooking
 Following recipes is all very good when you have time to go shopping for ingredients and essential cooking equipment. What about when you’re hungry and just want something to eat without the hassle of going to the grocery store? Or what about when you’re moving apartments (like I did last week) and want to use up all the random foods in the fridge and cupboards? That’s when Creative Cooking comes into play!
First, look for the main ingredients (some type of meat and/or vegetable).
First, look for the main ingredients (some type of meat and/or vegetable). I found 3 frozen salmon filets in my freezer and a can of bamboo shoots in water (which is fairly low in carbs) in my cupboard.
Second, see what kind of spices and oils (or herbs) you have to flavor the food.
Second, see what kind of spices and oils (or herbs) you have to flavor the food. I luckily hadn’t packed most of my spices and some cooking oils.
Third, determine what cooking equipment you have
Third, determine what cooking equipment you have e.g., pots, pans, oven, grill, etc. I had the oven and microwave (since they were part of the apartment) and some pots and pans.
Fourth, pick a recipe that you have most of the ingredients for – think of how to substitute for the missing ingredients if they are important
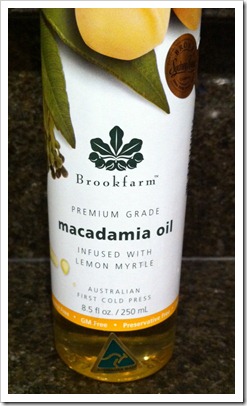
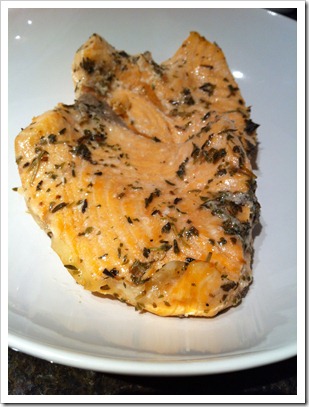
Fourth, pick a recipe that you have most of the ingredients for – think of how to substitute for the missing ingredients if they are important (i.e., ingredients that really flavor the dish). I wanted to make my salmon bake recipe, but I had no olive oil, no lemon juice, and no fresh parsley, which are 3 ingredients that really flavor the salmon. So I had to figure out some substitutes for them. I realized after a quick glance through my collection of oils that I had bought from Amazon a bottle of lemon infused macadamia oil (pictured below) a while back and never used it. This was a perfect replacement for both the olive oil and the lemon juice! And then I replaced the fresh parsley with some dried rosemary and thyme. I felt fairly confident that this would turn out ok since the recipe was pretty simple and the substitutions weren’t too crazy.
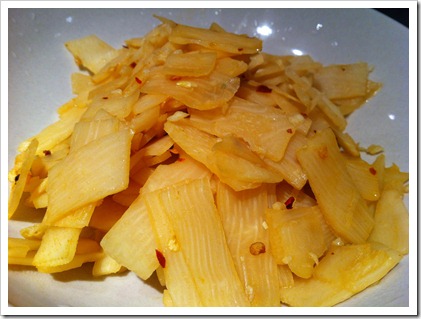
Then, I had to decide what to do with the bamboo shoots. I had never cooked bamboo shoots before and had bought the 14.8 oz can of bamboo on a whim, but I remembered eating them in Chinese restaurants with chili oil (usually as a cold appetizer). So I figured that chili and bamboo shoots went well together. I therefore decided to stir fry the bamboo shoots with some red chili flakes and hot sauce (since I had no chili sauce) and then added some minced garlic, , salt, and a touch of soy sauce for extra flavor. I was a bit apprehensive about how it would turn out, but it was delicious.
I was lucky that both dishes I made up turned out well; sometimes, it ends up being a disgusting mess. But, it’s fun to be creative, especially when it turns out well! Let me know if you’ve created any good or bad dishes recently by leaving a comment below.
Stevia Soft Drinks NOT Sweetened with Stevia
 The legal standard for false advertising seems to be very low. It seems that you can give completely misleading impressions about a product without facing any liability. Gone are the days when consumers can just pick up what they want from the supermarket shelf without worrying about studying the ingredients list (or maybe those days never existed). Now, we all have to be savvy consumers, especially if you are health conscious!
Artificial sweeteners have received a hoard of controversy over the years. Unsubstantiated scandals of cancer and side-effects of headaches and nausea have plagued their existence. However, Stevia, which is a zero-calorie, super sweet compound derived from plants, has gotten a lot of press in recent years for being “natural” and “safe.” It’s difficult to say exactly how “safe” anything is, but people seem to equate “natural” as being the same thing as “safe” (I’m not sure how great this illogical reasoning is, but that’s another matter).
Stevia has gotten so popular that several soft drink manufacturers have produced supposedly Stevia-sweetened sodas, such as Blue Sky Free and Zevia. However, if you drink these drinks or use Truvia (a popular brand of sweetener that contains Stevia), then you may have been duped….most of those drinks and sweeteners contain much higher quantities of sugar alcohol than Stevia!
Let’s talk briefly about each of 3 popular brands, either of Stevia itself or of a soft drink supposedly sweetened with Stevia:
- Truvia is one of the more popular brands of Stevia sweetener, but if you look at its ingredients, you’ll notice that the main ingredient is actually not Stevia at all, but erythritol. Erythritol is a sugar alcohol like sorbitol and xylitol, although it is “natural” like Stevia (in that it can be derived from plants). This is what gives each packet of Truvia 3 grams of carbohydrates and probably around 0.6 calories even though it’s labeled as zero-calories (as each gram of erythritol is 0.2 calories).
 Blue Sky Free is a soft drink made by Hansen (the company that makes “natural sodas”). I tried a can of Blue Sky Free (the cola flavor) when I was in Oregon, and I have to admit that it tasted OK (a bit flat, but not bad). So what’s the problem? Unfortunately, it is flavored with Truvia, so it also contains sugar alcohol rather than just pure Stevia as a sweetener. If you don’t care so much, you can buy it either online at Amazon or at one of the stores listed on their website. A pack of 24 cans costs $24 (or $20.40 with Subscribe and Save) on Amazon.
  Zevia is another soft drink that’s supposed to be sweetened with Stevia (hence the name that rhymes with Stevia). Like Blue Sky Free, Zevia comes in a variety of flavors (although Zevia has more flavors), but I found the grape soda to taste pretty good. Unlike Blue Sky Free, Zevia is not flavored with Truvia. INSTEAD, they add erythritol along with Stevia extract. In fact, erythritol is the second most populous ingredient except for carbonated water! So basically, Zevia is just as bad as Blue Sky Free, except that some Zevia flavors contain caffeine. If you’re considering trying Zevia, then use their discount coupon and buy a 6-pack from Wholefoods, although they are also sold on Amazon.
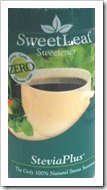 I personally think that sucralose is the best artificial sweetener out there both in terms of the slim chance of health problems and in terms of taste. But if you’re determined to use Stevia, then you ought to realize that very few things are currently flavored with just Stevia. SweetLeaf, which you can buy at Wholefoods or on Amazon, is a pure Stevia sweetener as opposed to Truvia. But it does taste more bitter, which is why Truvia, Blue Sky Free, and Zevia have chosen to put erythritol into the mix.
It’s hard to know who to trust when it comes to information about artificial sweeteners, but you should try not to be fooled by all the claims of “naturalness” from the advertisers! “Natural” does not always equate with “health,” and advertisers have zero interest in your health!
Apple Cinnamon Muffins
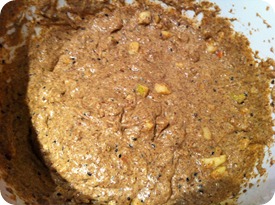
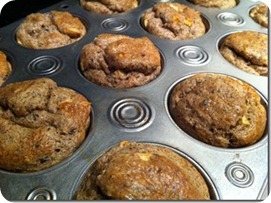
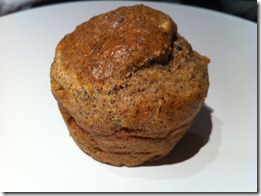 It would be wrong of me to go on about these delicious low carb muffins (gluten-free and grain-free) without giving you the recipe for them! So, it’s below… The muffins are 2g net carbs each and are really moist and full of flavors because of the spices and apple chunks in them. I keep them in the fridge and microwave one for 10 seconds on high to warm it up. They’re really convenient to take with you as breakfast or as a quick snack. You can try making them with other flavors, but I’ve generally found that apple and cinnamon go really well with artificial sweeteners (i.e. you can’t tell that it’s not real sugar!), whereas chocolate is really bad at hiding artificial sweeteners.
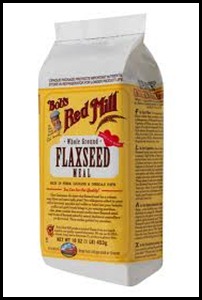
These muffins are flaxseed meal and almond meal based. You can either buy bags of flaxseed meal and almond meal (Wholefoods and a lot of larger grocery stores and health stores generally carry Bob’s Red Mill brand pictured below or you can buy it online at Amazon.com) or you can make your own by placing flaxseeds/almonds into a food processor or blender (the almonds can wear down the blade in your blender/food processor quickly). I generally make my own as it’s much cheaper to buy flaxseed and almonds unprocessed, but if you’re just starting to try low carb baking, then you might want to start with a small bag of flaxseed meal and of almond meal and see how you like the muffins before buying them in bulk. The other essential ingredient in low carb baking is coconut flour, and my next muffins post will on that!
Ingredients (makes 12 muffins)
- 1 cup of flax meal
- 1 cup of almond meal
- 1 tablespoon of black sesame seed (optional)
- 1 tablespoon of baking powder
- 1/4 teaspoon of salt
- 1 and 1/4 teaspoons of nutmeg
- 1 teaspoon of sugarfree vanilla extract
- 1 teaspoon of cinnamon
- 1 teaspoon of orange zest (optional)
- 1 cup equivalent of artificial sweetener
- 1/2 cup of butter, melted
- 4 eggs, beaten
- 1/3 cup of almond milk (can substitute water)
- 1 small apple, diced
Equipment: muffin/cupcake pan
Directions
- Preheat oven to 350F (175C).
- Grease muffin/cupcake pan with coconut oil or butter (ignore this step if you use muffin cups).
- Mix ingredients together and whisk well.
- Fill each muffin/cupcake cup to around 3/4 of the way.
- Bake for 20 minutes and cool before removing.
I’ve noticed that the muffins do shrink a bit once they cool, and they don’t look as fluffy as regular muffins, but they are deliciously moist even on reheating and much much healthier. In fact, I think these are better than many regular full carb muffins! Let me know what you think of the recipe and what variations you’ve tried.
The difference between low-carb and non-low-carb foods
When I shop, I like to look to see how many calories and how many carbs are in my foods. But, most of the numbers I’m used to seeing are under 10g of carbs per serving as I usually look at low carb foods. Even seeing something with 10g of carbs per serving might make me think twice before buying it! I had therefore completely forgotten just how many carbs were in non-low-carb foods!
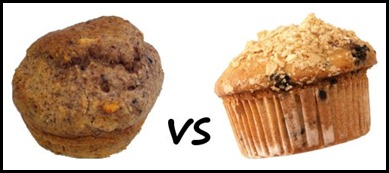
I recently made some delicious apple cinnamon muffins, and I was interested in knowing how their nutritional values compared with Starbucks muffins. Starbucks has very helpfully provided all the information on their website.
-
An apple bran muffin from Starbucks contains 57g net carbs.
-
A comparable sized apple cinnamon muffin that I made contained 4g net carbs.
That’s a 53g difference! It’s no wonder you feel so sluggish after your Starbucks break.
New Year’s Resolution–Cook More
 2012 is going to the year when I unleash my cooking potential! Already this year, I have made 3 new dishes (2 low carb desserts) and bought enough food that my refrigerator is staring to groan. However, I’ve made enough resolutions to know that 2 weeks is the average amount of time before the resolution crumbles and then collapses into a distant memory of yet another failure.
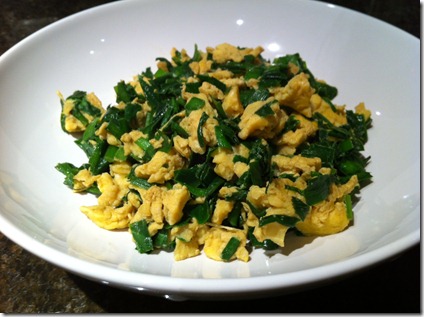
So this year, I’m going to help my lack of perseverance along a bit. Instead of just saying I’ll “cook more,” I’m going to be a bit more definite – I am going to cook at least twice a week. I’m also going to make more simple dishes, so that cooking doesn’t eat into my evenings too much. To kick start this new resolution, I made a really simple dish tonight. It took me all of 15 minutes and was delicious. The recipe for the so-simple-even-you-can-make-it eggs and Chinese chives stir-fry is below, but first, let me explain what Chinese chives are and why they are so amazing!
 Chinese chives look a bit like tall grass (see the photo on the right), but they have a very distinct fragrant smell and taste. Although they are similar to normal chives, they have a much stronger taste. It’s hard to describe the taste since it’s quite unique, but it’s probably something close to that of a leek with the sweetness of green onions and a touch of garlic. Doesn’t that sound delicious already?? Unfortunately, you can only find Chinese chives in Asian supermarkets, but you can substitute leeks or regular chives for the Chinese chives.
Ingredients (makes 2 servings)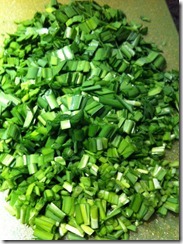
- 4 eggs, beaten
- 1 and 1/2 lbs of Chinese chives (or leeks or regular chives), chopped into 1/2 inch segments
- 2 tablespoons of coconut oil (or other cooking oil)
- 2 tablespoons of soy sauce
Directions
- Pour 2 tablespoons of oil into a frying pan.
- Add the eggs and scramble them.
- When the eggs are cooked, add the chives and cook for 7 minutes on medium heat stirring every few minutes until the chives look wilted.
- Add the 2 tablespoons of soy sauce and stir.
It’s a great dish to have for breakfast, lunch, or dinner. And it’s easy and super quick to make! I wish all recipes were so simple!
Low Carb Pizza
| Low Carb Pizza |
- 3 tablespoons of flax meal (you can make your own by grinding flax seeds in a blender or coffee grinder)
- 2 tablespoons of parmesan cheese
- 1/4 teaspoon of baking powder
- 1 egg
- 2 teaspoons of water
- 1 teaspoon of olive oil
- 1/4 teaspoon of garlic powder
- 1/4 teaspoon of onion powder
- 1 teaspoon of Italian seasoning (or just throw in a bit of basil, oregano, rosemary, thyme, and marjoram or whatever you have handy!)
- 1/2 teaspoon of salt
- Crust:
- Mix all the ingredients together in a bowl until there are no lumps of flax meal or parmesan cheese.
- Grease a microwavable plate that’s larger than 8-inches in diameter (i.e., most dinner plates) with some olive oil (using a paper towel to smudge it around the plate) or use a spray.
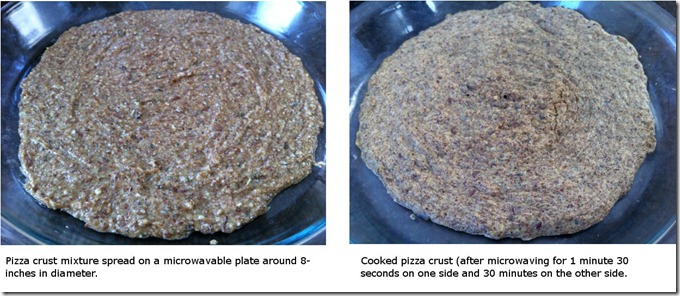
- Scoop mixture onto a plate. Spread the mixture in a circular motion using the back of a tablespoon until you create a flat disc around 8-inches in diameter. Make sure the dough isn’t broken in places as you don’t want holes in your pizza crust!
- Microwave for 1 minute 30 seconds on high. Flip it over carefully using a spatula and microwave on high for another 30 seconds.
- If you want the crust to be harder, then you can fry it. Just put a teaspoon of olive oil into a flat frying pan and fry each side for 2 minutes or until you think it’s hard enough. I’m lazy and am ok with a soft crust for the pizza.
- To cook the pizza (after putting sauce and toppings on – see below for those), heat the oven to 350F and bake for 15 minutes.
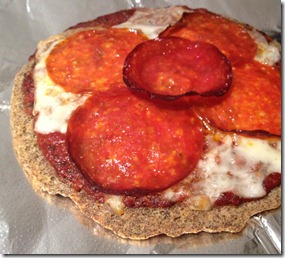 I always thought low carb pizza was some sort of myth (closely akin to unicorns and the Yeti) until I saw this recipe on Linda’s genaw.com. This recipe (which is below) makes individual 8-inch pizzas and is simple to make. The crust is made from a mixture of flax meal and parmesan cheese, which you cook in the microwave in just 2 minutes! Then for the sauce, you can go really easy and just use store-bought pizza sauce or make your own homemade pizza sauce using the recipe below (which just involves mixing some ingredients together and no cooking). I really like the sauce and recommend making it (it has very few carbs and tastes great). The recipe for the sauce makes a fair amount of sauce – enough for 8-10 pizzas (I found the recipe on allrecipes.com – it looked so simple to make and got great reviews from nearly 300 reviewers).
Ingredients to make 1 crust :
- 3 tablespoons of flax meal (you can make your own by grinding flax seeds in a blender or coffee grinder)
- 2 tablespoons of parmesan cheese
- 1/4 teaspoon of baking powder
- 1 egg
- 2 teaspoons of water
- 1 teaspoon of olive oil
- OPTIONAL INGREDIENTS
- 1/4 teaspoon of garlic powder
- 1/4 teaspoon of onion powder
- 1 teaspoon of Italian seasoning (or just throw in a bit of basil, oregano, rosemary, thyme, and marjoram or whatever you have handy!)
- 1/2 teaspoon of salt
Directions:
- Mix all the ingredients together in a bowl until there are no lumps of flax meal or parmesan cheese.
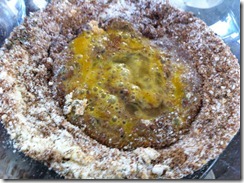
- Grease a microwavable plate that’s larger than 8-inches in diameter (i.e., most dinner plates) with some olive oil (using a paper towel to smudge it around the plate) or use a spray.
- Scoop mixture onto a plate. Spread the mixture in a circular motion using the back of a tablespoon until you create a flat disc around 8-inches in diameter. Make sure the dough isn’t broken in places as you don’t want holes in your pizza crust!
- Microwave for 1 minute 30 seconds on high. Flip it over carefully using a spatula and microwave on high for another 30 seconds.
- If you want the crust to be harder, then you can fry it. Just put a teaspoon of olive oil into a flat frying pan and fry each side for 2 minutes or until you think it’s hard enough. I’m lazy and am ok with a soft crust for the pizza.
- To cook the pizza (after putting sauce and toppings on – see below for those), heat the oven to 350F and bake for 15 minutes.
Ingredients to Make Pizza Sauce (good for 8-10 pizzas):
- 1 can (6oz) of tomato paste
- 1 and 1/2 cups of water
- 1/3 cup of olive oil
- 2 cloves garlic, minced
- 1/2 tablespoon of dried oregano
- 1/2 tablespoon of dried basil
- 1/2 tablespoon of dried rosemary (crushed – I just used my fingers to crumble some)
- Alternatively (instead of oregano, basil and rosemary, you can just put 1 and 1/2 tablespoons of Italian seasoning).
- 2 teaspoon of salt (0r to taste)
- 1/2 teaspoon of pepper (or to taste)
Directions:
- Mix everything together well. Best used after it’s been left to stand for a few hours, but it tastes pretty good even if you use it straight away.
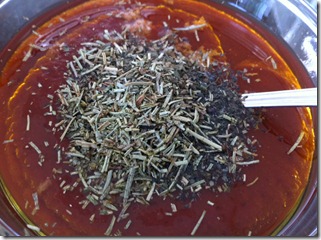
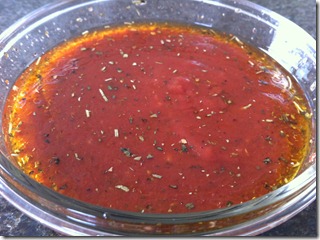
The photos below show me about to mix all the ingredients and after it’s mixed.
Toppings:
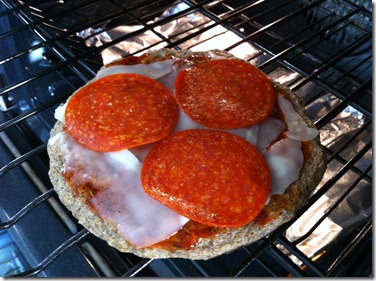
I put a few slices of mozzarella and pepperoni on top, but you’re welcome to pick your own toppings. Here’s one last photo, which shows the pizza about to go into the oven.
Butternut Squash Soup
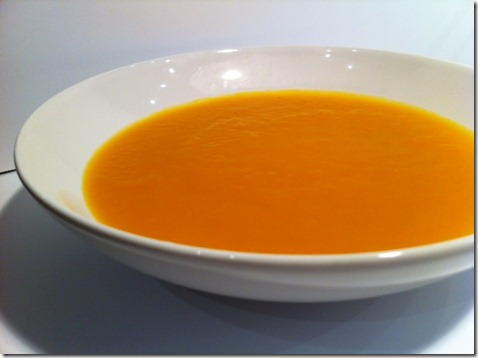
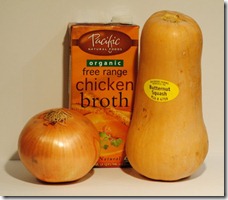 Winter has most definitely set in again (unless you’re in the southern hemisphere, in which case, I truly envy you right now!). This weekend has been literally freezing in New York, so I decided to keep warm with some butternut squash soup, which is both delicious and easy to make!
Those 3 ingredients you see pictured on the left are pretty much all you need! (In addition, a blender, a food processor, or an immersion blender – which is the best one to use – is also crucial to create that smooth soup texture.)
Ingredients (4 servings)
- 1 chopped onion (I used half of the one in the photo as it was a really large onion)
- 32oz (4 cups) chicken broth
- 1 butternut squash
- 1 tablespoon of coconut oil (or dab of butter)
- salt to taste
- nutmeg and pepper (optional)
Directions
- Chop the onion (no need to chop it particularly finely).
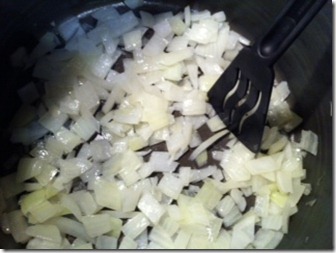
- Add 1 tablespoon of coconut oil (or butter) to a large pot (large enough for more than 8 cups of liquid) and add the chopped onions. Sauté the onions on low heat until they turn transparent (5-10minutes).
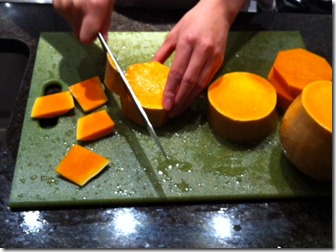
- While the onions are cooking, chop up the butternut squash. I cut it into 1-inch thick slices and then take off the skin by chopping it off (see photo below). Then I cut the squash into roughly 1-inch cubes.
- When the onions turn transparent (the onions have turned transparent in the photo below), pour in the 32 ounces of chicken broth. Then add the chopped squash and simmer on a medium heat for 1 hour.
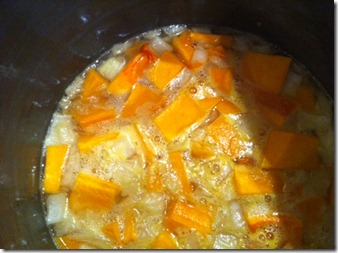
- Now comes the hard part. If you have an immersion blender, then stick it into the pot and puree the cooked veggies to create the soup. (Try to keep the end of the stick immersed in the soup to prevent too much splashing.) If you don’t have an immersion blender, then you’ll need to take the softened veggies (squash and onions) out of the pot, without the liquid, and place it into a blender or food processor to puree.
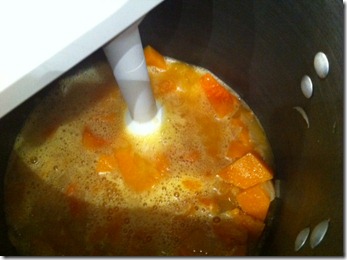
- Once pureed, season with salt. Try a bit of the soup to see how much salt you want. If the butternut squash you used was very ripe, then your soup may be sweeter and therefore you might want less salt. You can also add pepper and nutmeg.
- Cook for another half hour and serve.
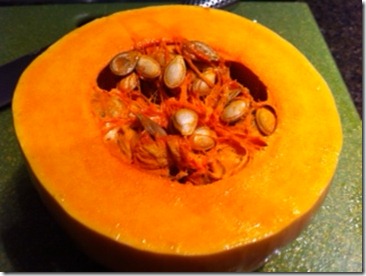
Added Bonus: When you were cutting up the butternut squash, you probably noticed all those seeds inside of the squash. If you scoop these out (I use my hands) and wash them clean, you can then cook them for 30min in the oven at 350F on a piece of aluminum foil and eat them whole as a crispy snack.
If you don’t like butternut squash, you can substitute sweet potatoes (or Japanese yams) or pumpkin, or you can mix it up. I’ve made the soup before with a butternut squash, 2 Japanese yams and a can of pumpkin puree (in which case I needed 64oz of chicken broth).
Note: butternut squash is one of the more starchy squashes (1 cup = 18g net carbs), and it isn’t permitted on the Atkins diet until the later stages. It is however permitted on primal and paleo diets, and many low-carbers are ok with eating butternut squash, yams, and pumpkins as long as you don’t go overboard!
Zero Calorie Salad Dressings–Reviews
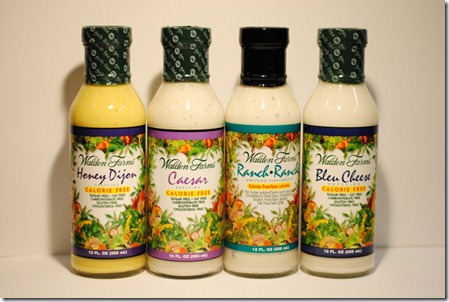 When I first heard about Walden Farm’s calorie-free salad dressings, my reaction was immediately…is that possible?? Previously, I had thought the only possible low-carb low-calorie options were salt and red wine vinegar (balsamic vinegar has sugar in it). However, after trying their calorie-free syrup (pretty decent) with my coconut flour pancakes and their BBQ sauce with my pulled pork, I thought it’d give it a go with their range of salad dressings.
The Flavors
Walden Farm’s website lists a healthy selection of 20 different flavors, ranging from your common Caesar dressing to you more exotic Chipotle Ranch. However, my local Food Emporium (you can search their website for where their sauces are sold or buy it online at stores like Amazon) only carried 4 different flavors (at $4.19 each).
Review 1 – Walden Farm Ranch Flavor
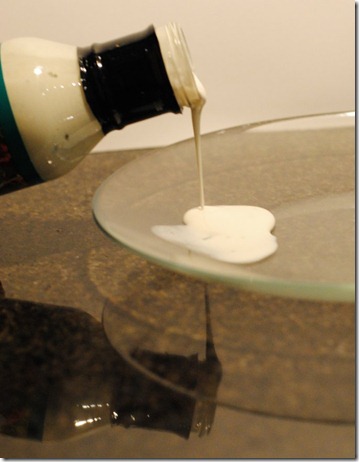
If white paint were a salad dressing, then this is how it would look when poured out of the bottle:
Unfortunately, the smell also resembled paint, with a tinge of ranch and a heck of a lot of vinegar. It honestly made my stomach turn, and I wasn’t sure if I could eat it at all. But I had a salad all lined up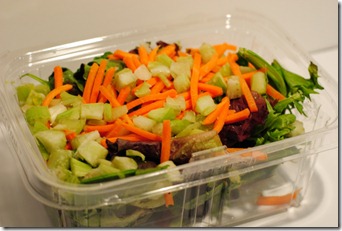 , which had come with a 220 calorie packet of Newman’s ranch dressing that was already in the trash. I had to brave the smell – maybe the taste would be better? I dipped a few leaves into the white liquid, held my breath, and placed the “food” into my mouth. My first thought was “EWWWW” followed by it tastes like paint, followed by paint thinned with vinegar. But, by the time I had finished chewing the mouthful, it did taste a bit like ranch and was almost edible. I guess if you’re expecting a creamy ranch dressing, think again! A better description would probably be ranch-flavored vinaigrette (if you’re trying to be nice). I personally would never eat this again (and I hope you all appreciate what I went through to review this!), but perhaps the point that many Amazon reviewers make is worth bearing in mind here – it is zero calories….you obviously can’t expect it to taste like actual ranch salad dressing. With that thought in mind, I moved onto the Honey Dijon flavor.
Review 2 – Walden Farm Honey Dijon Flavor
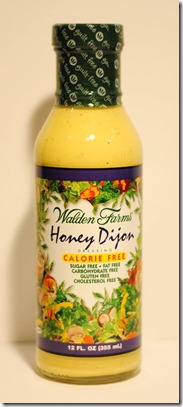 Whereas the ranch dressing was thin and liquidy, this one was actually pretty thick. It was a promising start – at least it looked like honey mustard dressing! Then I smelled it. Oh dear. I felt my stomach churn. It smelled like honey mustard flavored rubber. The rubber smell was quite overwhelming, and again, I didn’t want to put the food into my mouth. The taste was just as bad. I know that I taste food pretty strongly (I can often detect flavors and smells that other people miss), but this has to be obvious to everyone, right? Reading the Amazon reviews of all the people who simply “love” this product shocks me! I think I have to agree with the person who titled their review “Yuck.”
An hour later, I wanted to give the salad dressing a second chance, and I mixed a tiny amount in with some salad. I thought that maybe if a small amount of the dressing was well dispersed throughout the salad, then it would taste a bit better. Just the smell almost stopped me from ever getting close to that thing again! But, I for the sake of this blog, I held my breath and put it into my mouth. I am happy to admit that I was able to swallow the 2 pieces of leaves. The dressing still tasted like rubber to me, but the taste wasn’t so strong due to the mixing. But, at this point, I think I might just have the salad without any dressing.
Review 3 – Walden Farm Blue Cheese Flavor
 As if I wasn’t already worried about trying my third bottle of Walden Farm’s salad dressing after my awful (almost-puking) experiences with the first two bottles, I then read a review of the Blue Cheese flavor, described in one review as tasting and smelling like “white glue.” After trying the dressing, I can understand the “white glue” description. It definitely looked like white glue, and I have to admit it did smell a bit like glue too! However, this one seemed to taste more like the advertised flavor than the others. I definitely tasted blue cheese flavor, the texture was nice and thick (if you can get rid of the white glue imagery), and it wasn’t as vinegary as the previous two. The downside of course is that it still doesn’t taste like real dressing. There’s some odd taste to all their dressings (petroleum?) that sadly just disgusts me.
Review 4 – Walden Farm Caesar Flavor
I feel like I’ve pretty much run out of things to say about these salad dressings. They all taste slightly different, but they all seem pretty inedible to me. The Caesar flavored one smells kind of like actual Caesar dressing and looks like it, but doesn’t taste like it. It has a salty glue taste (different to blue cheese flavor).
Review 5 – Walden Farm Raspberry Vinaigrette Flavor
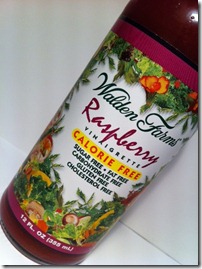 I found this at a different Food Emporium, and so I thought I’d add it to the list. This seemed to have received the most positive reviews on Amazon, and so I was almost eager to try it despite everything else! It smelled and looked like a raspberry vinaigrette (as opposed to paint or glue) – so kudos for that! The taste was ok – I could still taste something slightly weird (again resembling petroleum or greasy oil) that they must put into all their dressings to make them calorie free, but the raspberry and vinegar tastes were also strong, which made it much better than the others. So, overall, I would say that this was the best one, although the claim of being edible is barely anything to celebrate about considering that most vinaigrette dressings are very low in calories (often under 50 calories for 2 tablespoons and with very low carbs and fat).
Conclusion
If you’ve read what I’ve written above, then you’re probably not all that tempted. However, I have to say that although I have been severely disappointed by these 5 salad dressings from Walden Farms, I do enjoy several of their other products (their pancake syrup and their BBQ sauce) and am very amazed by how they’re able to suck calories out of everything!
Spaghetti and Meatballs
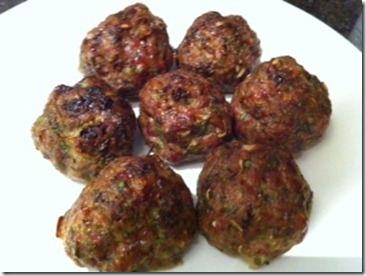
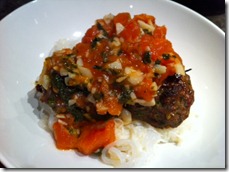 Following up on my low carb pasta post a few months ago, here’s a recipe for a nice low carb meal of spaghetti and meatballs (using shirataki or zucchini noodles). I’d start by making the meatballs (you can make these in advance and then heat them up later). Everything is freshly made except for the shirataki spaghetti, which you easily purchase at Wholefoods or at various supermarkets (most Korean supermarkets sell a variety of them).
Meatballs: Ingredients (makes 16-20 meatballs)
- 2lbs pork tenderloin or other lean cut of pork minced or beef or turkey or whatever type of meat you want to use in a food processor (you can buy ground meat, but I prefer to grind my own, since I then know exactly what is going into it)
- 1 cup chopped green onions
- 2 eggs, beaten (this holds the meatballs together)
- 2 tablespoons of garlic powder (or granulated garlic)
- 3 tablespoons of salt
- (Optional) 2 tablespoons of thyme
- (Optional) 2 tablespoons of fennel seeds (I particularly like to use fennel seeds with beef, but they add a lot of flavor with all meats)
- Preheat oven to 350F.
- Beat the eggs and food process the pork so that it’s minced.
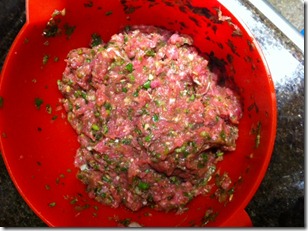
- Mix all the ingredients together in a large bowl (I use my hands to do the mixing).
- Shape meatballs with your hands into 1 to 1.5 inch diameter balls (size of a golfball or a little bit bigger), and place them on a non-stick baking tray (no need to grease it). It makes around 16-20 meatballs, depending on how big you make them.
- Put it in the oven and cook for 45 minutes (ovens and sizes of the meatballs can differ and so the cooking time can vary – I would cut one in half to make sure the meat is cooked all the way through).
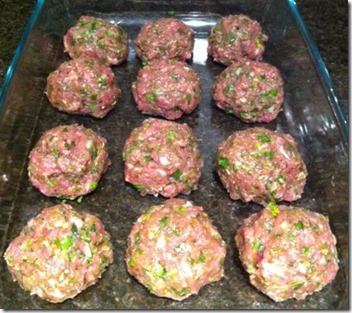
- (Optional) You can brown the meatballs a little by putting them under the broiler for 2 minutes after they’re cooked.
Tomato Sauce: Ingredients (makes 2 servings)
- 1 tablespoon olive oil
- 8 cloves of garlic, minced
- 1/4 cup of chopped basil
- 3 tomatoes, peeled, seeded and diced (I would recommend using the serrated peeler to peel the tomatoes – the pack of 3 peels also comes with a julienne peeler, which is perfect for making zucchini noodles)
- 1/4 cup white wine
- 1/2 cup chicken broth
- salt and pepper to taste (I put in 1.5 tablespoons of salt and a pinch of pepper)
Tomato Sauce: Directions
- Place the olive oil in a large frying pan at medium temperature.
- Put the minced garlic into the oil and fry for 5 minutes without browning it.
- Add the tomatoes, basil and cook for another 2 minutes.
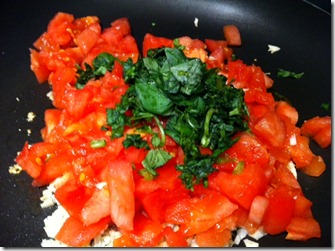
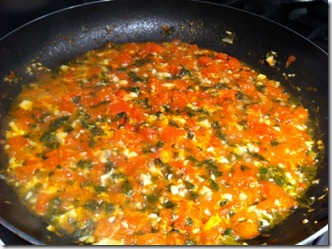
- Add the white wine and the chicken broth and cook for around 10-15 minutes on medium heat (so that it’s simmering) until the sauce is less liquid-y.
Putting It All Together:
If you’re making zucchini noodles, then you should use a julienne peeler to create the noodles (see low carb pasta post for directions) and then cook the zucchini noodles for 30 seconds on high in the microwave. If you’re planning to use Shirataki (miracle) noodles, then rinse them in cold water and then place them in the microwave for 30 seconds on high to get rid of any excess water. Since both types of pasta are pretty much carb-less and calorie-less, you can pretty much use as much as you want (I recommend 1 zucchini per serving or 1 packet of Shirataki noodles per serving just so you don’t run out of sauce).
Place the pasta on the bottom of a bowl, place 3 meatballs on top, and then pour the sauce onto it.
I calculated each meatball at around 90 calories (for 1.5inch diameter pork meatballs) and 130 calories for each serving of sauce. So for a bowl of 3 meatballs plus the sauce and pasta, it’s around 400 calories. The meatballs have negligible carbs and each serving of sauce has around 4g net carbs (mostly from the garlic and tomatoes). All-Paleo for those of you who care.
Tuna Fish Salad
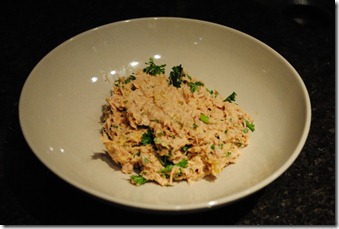 I used to hate tuna fish, and even now I still don’t eat much tuna fish, despite the fact that I generally love seafood. I find tuna fish dry and odd tasting, so the only way I’ll eat tuna fish is in the tuna salad pictured to the left. It’s based on a recipe that I found on allrecipes.com (Barbie’s Tuna Salad), but I’ve modified it slightly to lower the calories and make it taste even better. I use light mayo (Smart Balance, which is low fat and low calorie), less sweet pickle relish and no parmesan cheese (I couldn’t taste it at all!) to cut down on the calories. I also put in less dill and more curry powder than the original recipe calls for (my version is below, of course). All in all, it’s a delicious tuna salad that’s full of protein, is low in carbs, and is relatively low in calories. I make it by the bucket load, so that I have enough to eat for at least a week – Costco sells tuna in 5lb tins, and each tin makes a huge mixing bowl-full that takes me around a week to finish eating.
Here’s my recipe:
Ingredients:
- One 5lb can (or around ten 7-ounce cans or fourteen 5-ounce cans) of tuna in water (I use the chunk light tuna as I find the white tuna to be too dry) – drain the tuna and flake it thoroughly with a fork
- 1 and 1/4 cups of light mayo (I use Smart Balance Plus Omega)
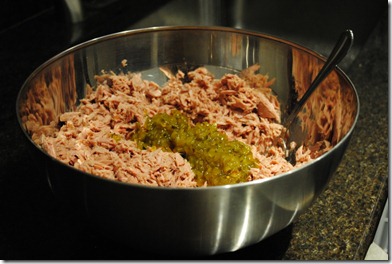
- 10 tablespoons of sweet pickle relish (this does have some sugar in it, but makes the tuna salad taste so much better!!) I’ve tried substituting this for zero-sugar pickle relish or just omitting it altogether, but the recipe just doesn’t work without it.
- 3 tablespoons dried onion flakes (this gives the tuna fish a bit of a crunchy texture)
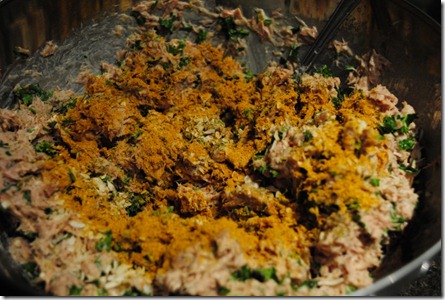
- 2 and 1/2 tablespoons of curry powder (this is absolutely key in this recipe, but don’t worry – it doesn’t make it taste like curry…it just gives it that hint of curry flavor, which adds so much more dimension and deliciousness to this tuna salad)
- 1 cup of freshly chopped parsley (you can chop it by hand or in the food processor for a more thorough chop) – the original recipe calls for dried parsley, which you can’t really taste, and so I prefer to use fresh parsley
- (Optional) 3 tablespoons of dried dill weed (I don’t really like the taste of dill, and luckily you can’t really taste it the tuna salad, but if you prefer more of a dill taste, you can decrease the amount of parsley and increase the amount of dill or use fresh dill and dried parsley)
- (Optional) 2 tablespoons of granulated garlic (or garlic powder) – it adds just a bit of subtle flavor
Directions:
This is the simple part – just put everything in a large bowl and mix well (make sure all the tuna is well flaked so that the flavors can mix in with it).
This takes around 20 minutes to prepare. I would say it makes around ten 8-oz servings, and each serving contains around 250 calories.
You can obviously scale the recipe down if you don’t want to make so much tuna in one go, but just be careful to do the calculations correctly.
